Are you looking to grow your business by running targeted ad campaigns on Facebook? Before you make those meaningful connections with potential clients, you’ll need to create an account on Facebook Ads Manager.
Today on Put a Pin in It, Andrea Tremper gives you step-by-step instructions for setting up your Ads Manager account.
Video Transcription
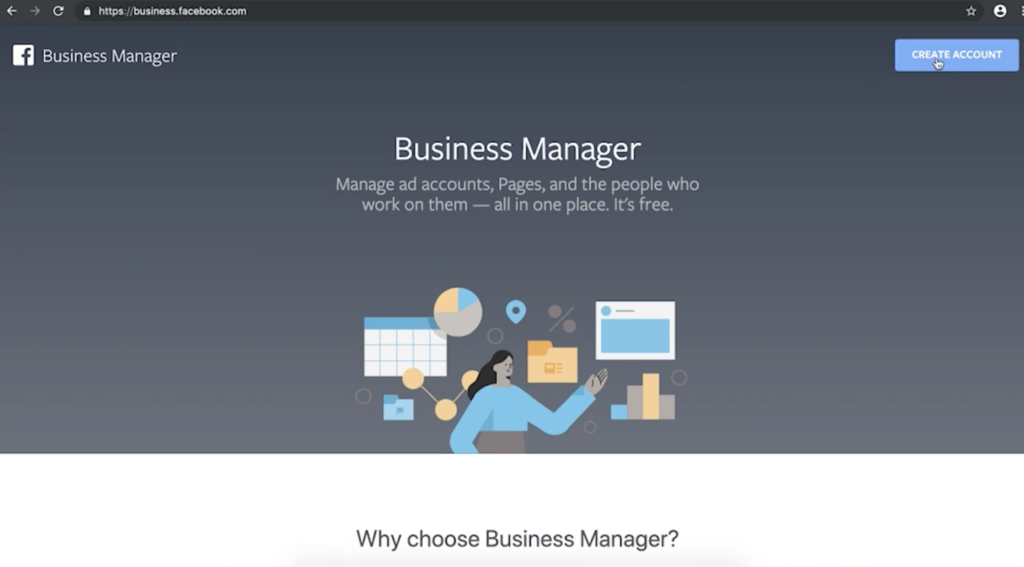
To get started, first you’ll need to create an account on Facebook Business Manager. To do this, just log right in to your Facebook on your browser and then navigate to business.facebook.com. From there, you’re going to click Create Account.
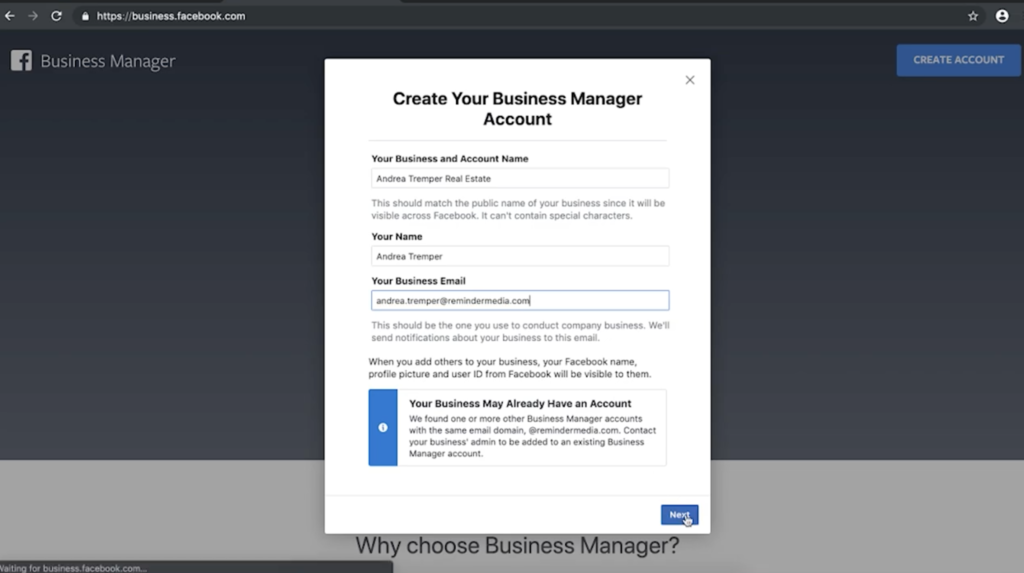
Facebook is going to ask for your business name, your name, and your business email. You’re going to enter each of these, and then click Next.
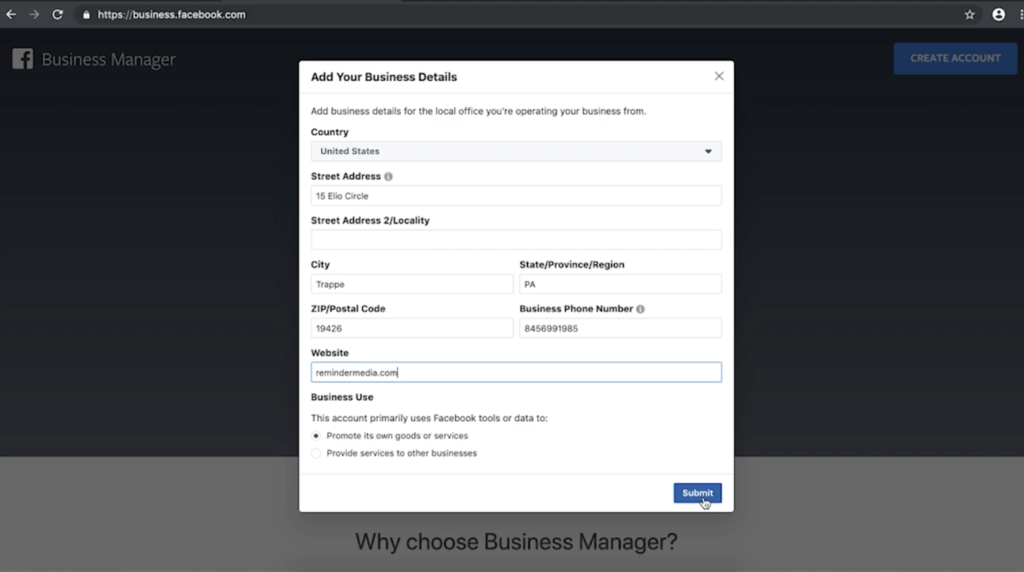
On this next screen, you’re going to enter your business’s address, phone number, and website URL. Then, you’re going to click either Promote Its Own Goods or Services or Provide Services to Other Businesses. It just depends on if your brand is a B2C or B2B.
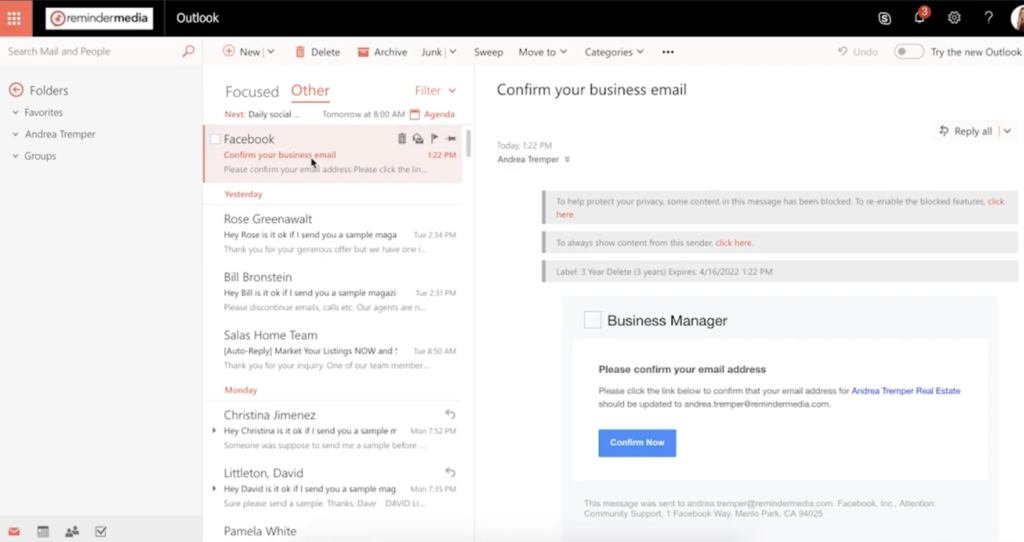
Next, Facebook is going to tell you to check your email address so you can verify the email that you put on file. So, first, click Done. Then, open a new browser window to check your email. Once you’re able to navigate to the email that Facebook sent you, you’re going to find it and click the Confirm Now button inside that email.
Now that you’ve confirmed your Business Manager account, you can connect it to any page you already manage. If you don’t already have a Facebook business page for your account, check out the link in the description of this video to learn how.
Download a PDF sample of American Lifestyle to stay in touch with past clients.
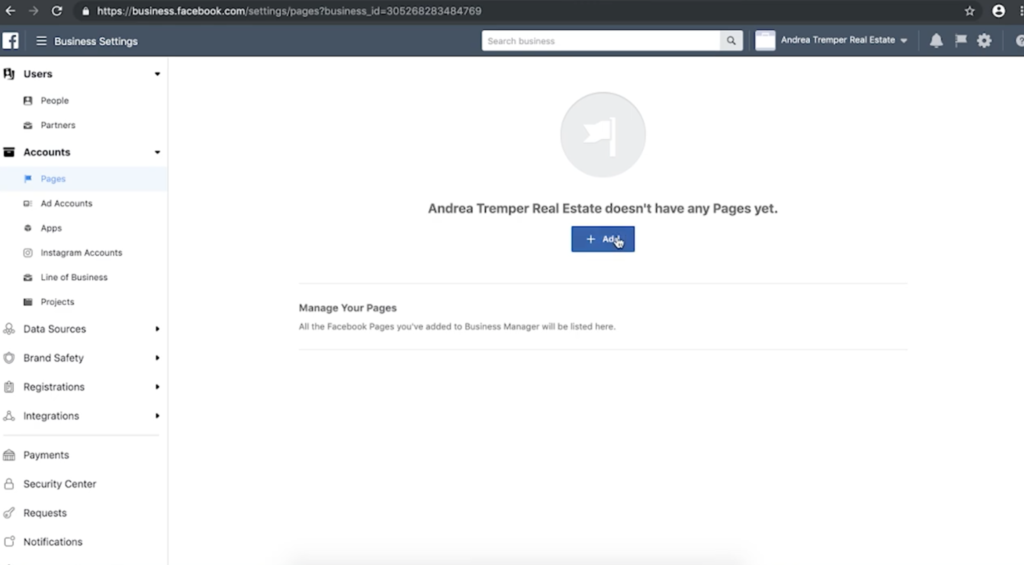
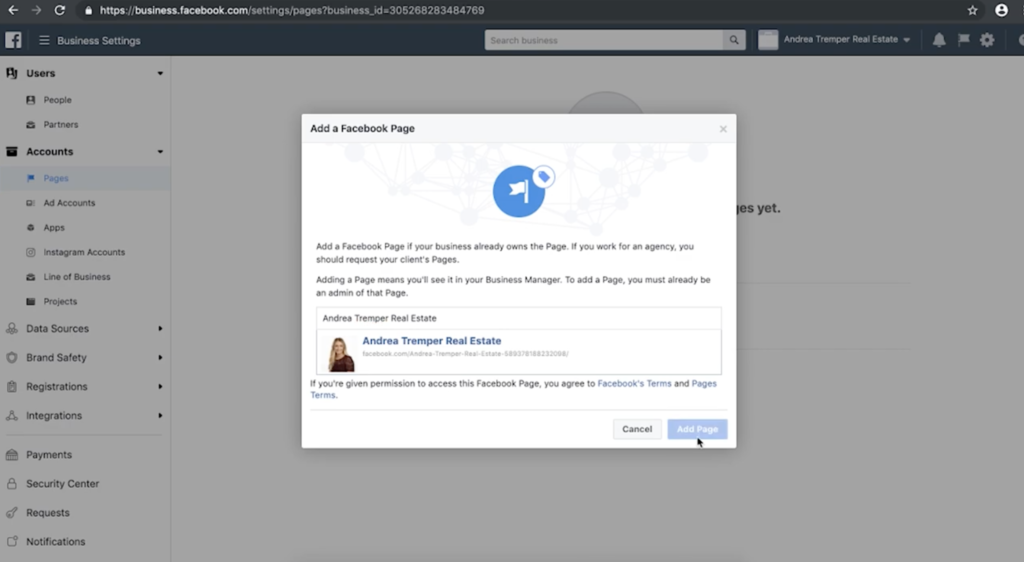
To add your Facebook business page to your account, click the Pages link under the Accounts section on the left. Next, click the blue Add button. Start typing your business’s name, and it should pop right up. You can select that and click Add Page.
Next, you’re going to need to add a payment method. On the left-hand side near the bottom, click Payments. You’re going to click the blue Add button. From there, follow the instructions on the screen to add your credit or debit card, and then you’ll click Continue when you’re done.
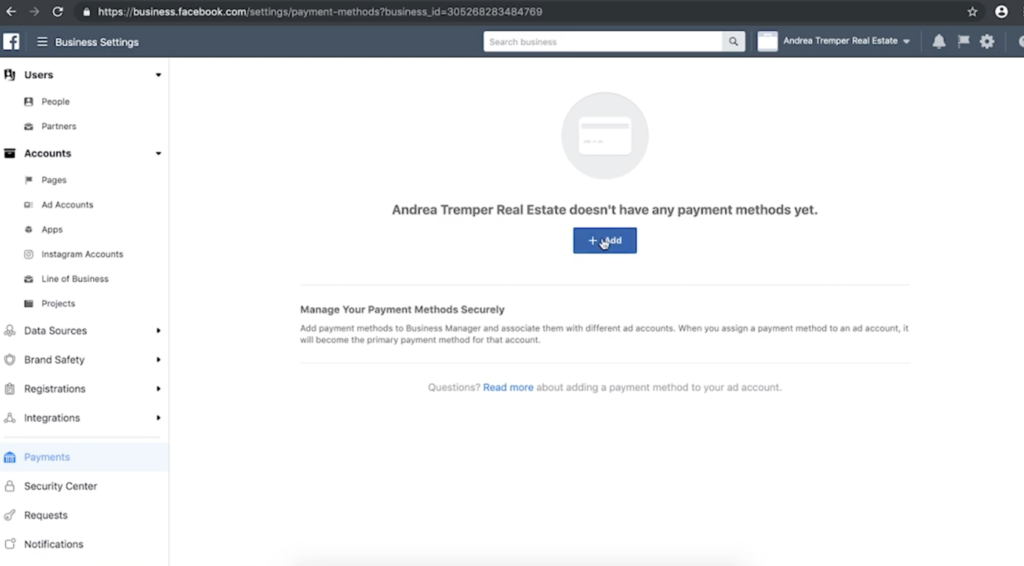
There’s just one more thing you need to do before you can actually start running ads on your account. On the left-hand side under Accounts, click Add Accounts. Now, click the blue add button. From the menu that pops up, you’re going to click Create a New Account.
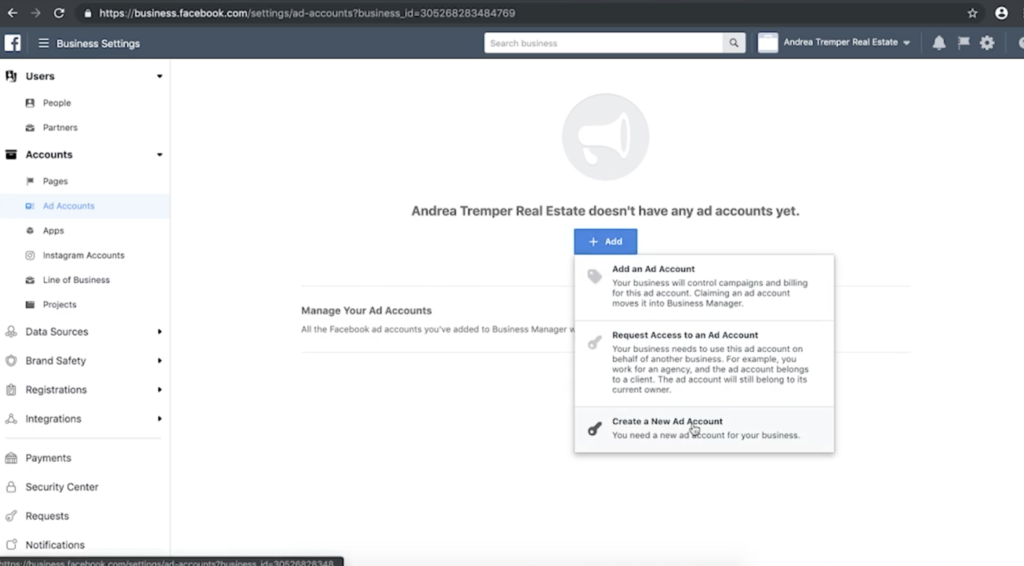
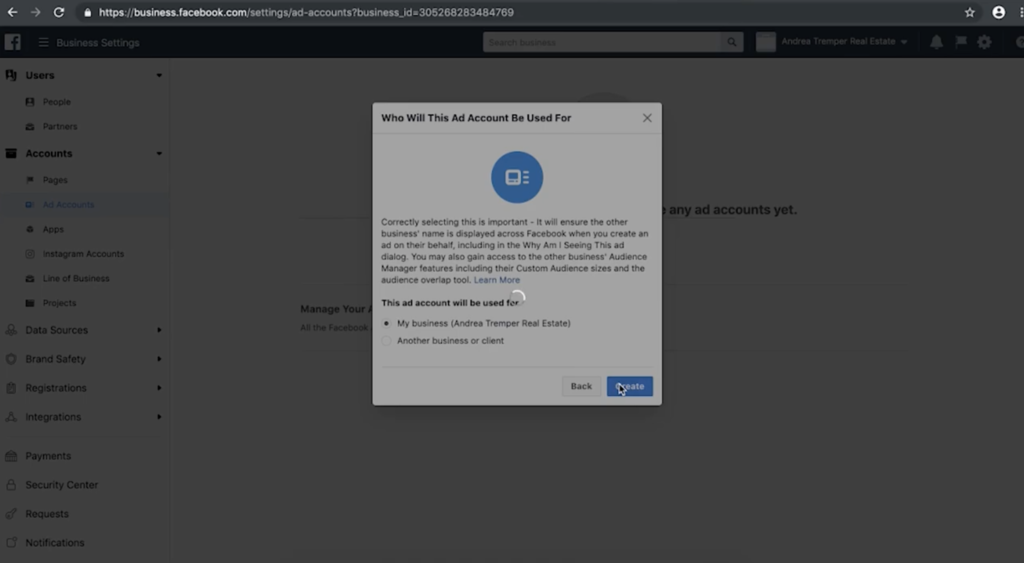
You’ll need to name your account, select your time zone, currency, and payment method, and then click Next. Click the button next to your business’s name, and click Create.
On this next page, you can specify any additional people who you’d like to give administrative permissions. To do this, you can search for those people right in that box, and then assign different roles to them. The drop-down menu to the right will tell you exactly what each role means. For now, I’m just going to skip this step by clicking the button at the bottom.
The takeaway
Congratulations! Your account is now ready to go. You can navigate to facebook.com/adsmanager to start creating ads. If you liked this video, be sure to subscribe to this YouTube channel. Find ReminderMedia on Facebook and Instagram. And, most importantly, put a pin in it.




 Apple Podcasts
 Google Play
 Spotify


