


Whether you’re looking to connect with new leads or maintain relationships with your current customer base, going live on social media is a great way to keep your business top of mind.
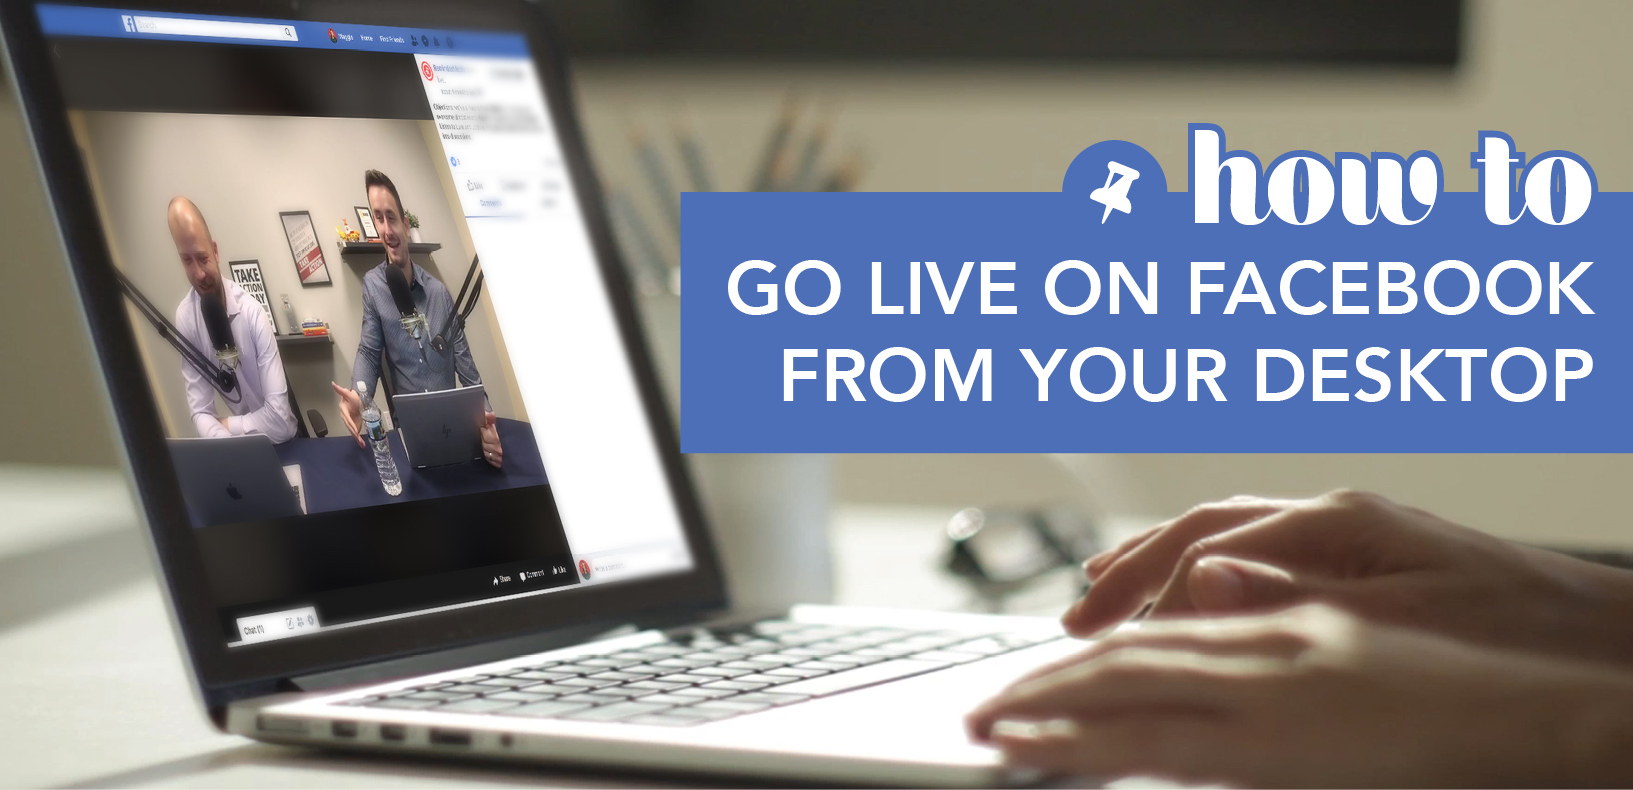
We previously showed you how to go live on Facebook using your mobile device. Today on Put a Pin in It, Andrea Tremper walks you, step by step, through the desktop version of Facebook Live.
Video Transcription
If you’ve been looking for a great way to get more interactive with your social media followers, Facebook Live is a great option. Lucky for you, it’s never been easier to go live. And today, I’m going to show you how to go live from your desktop or laptop computer.
If you’ve got a laptop or a desktop with a webcam installed, you can go live in just a few clicks. The first thing you’ll want to do to go live is log in to your Facebook page.
Then, navigate to the top of the page where it says Create Post. Select the three dots, which will expand your options. Click the Live Video option. Once you select Live Video, Facebook will take you to its Live Producer Page.
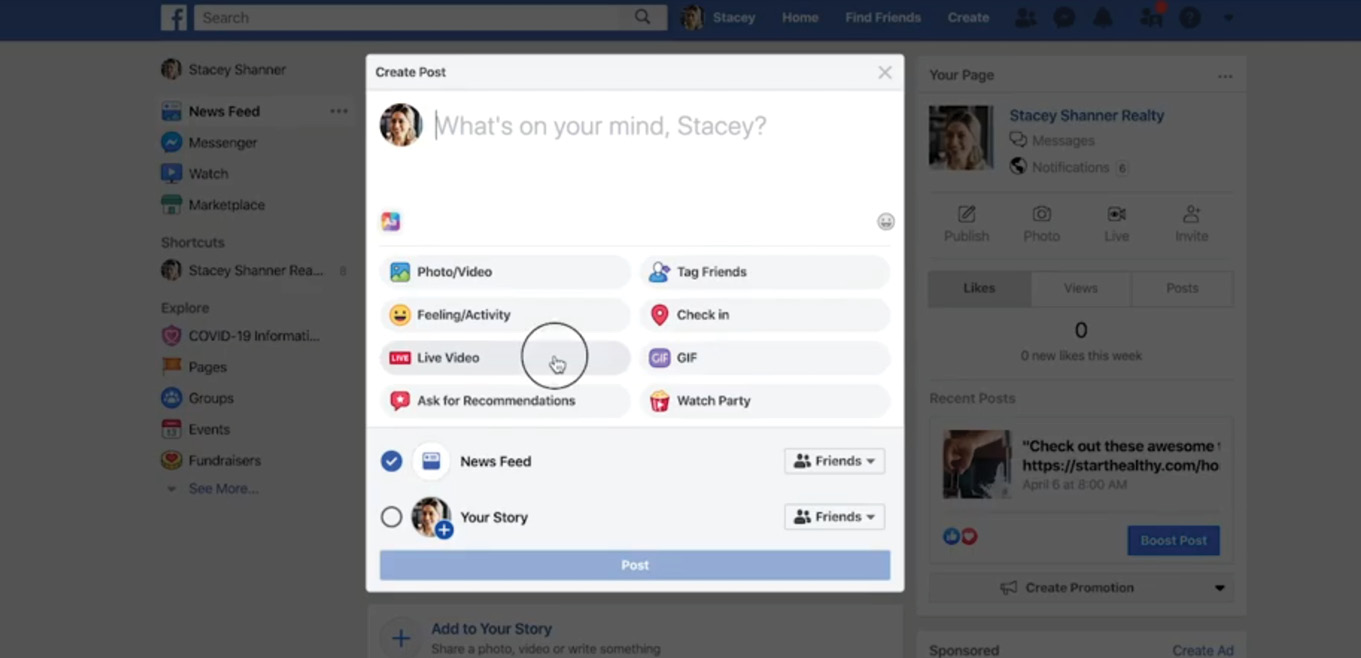
On the left side of the screen, there are a few different options. Start with the top left. You can choose to Go Live Now or Schedule a Live Video. Once you select to Go Live Now or Schedule a Live Video, you can navigate to the section below that called Post. The drop down menu allows you to select Share to Your Timeline, Share to a Page You Manage, or Share in a Group. Share to a Page You Manage will allow you to go live on your Business Page.
If you only have one Business Page, Facebook will default to that. In the same box, there is a field called Live Video Title. Here you can name your video something eye-catching and descriptive to entice your followers to watch. You can also include a short description in the box that reads: Say Something About This Video… so that your audience has some context.

Once you’ve named your Live video, navigate to the middle of the right side of the page to the section named Live Video Setup. There are three different options: Use Stream Key, Use Camera, and Use Paired Encoder. You will want to select Use Camera.
Once Use Camera is selected it will prompt you to the box labeled Setup, which allows you to select the camera and microphone. If it’s your first time using your computer’s built-in microphone, a blue box will appear next to the microphone symbol to test your audio levels. If you start speaking, audio waves should begin to appear in the box to show you that it’s working.

If you want to preview how your Facebook Live will look, navigate to the small thumbnail image of yourself at the bottom of your screen. If you hover your cursor over the image, an icon will appear in the top right-hand corner with two arrows. Click this icon to expand the thumbnail and preview your video full screen.
Once everything is set up and you’re ready to start, you can click the button labeled Go Live in the bottom left-hand corner of your screen. Facebook will count down from three, and then you’ll officially be Live for your followers.
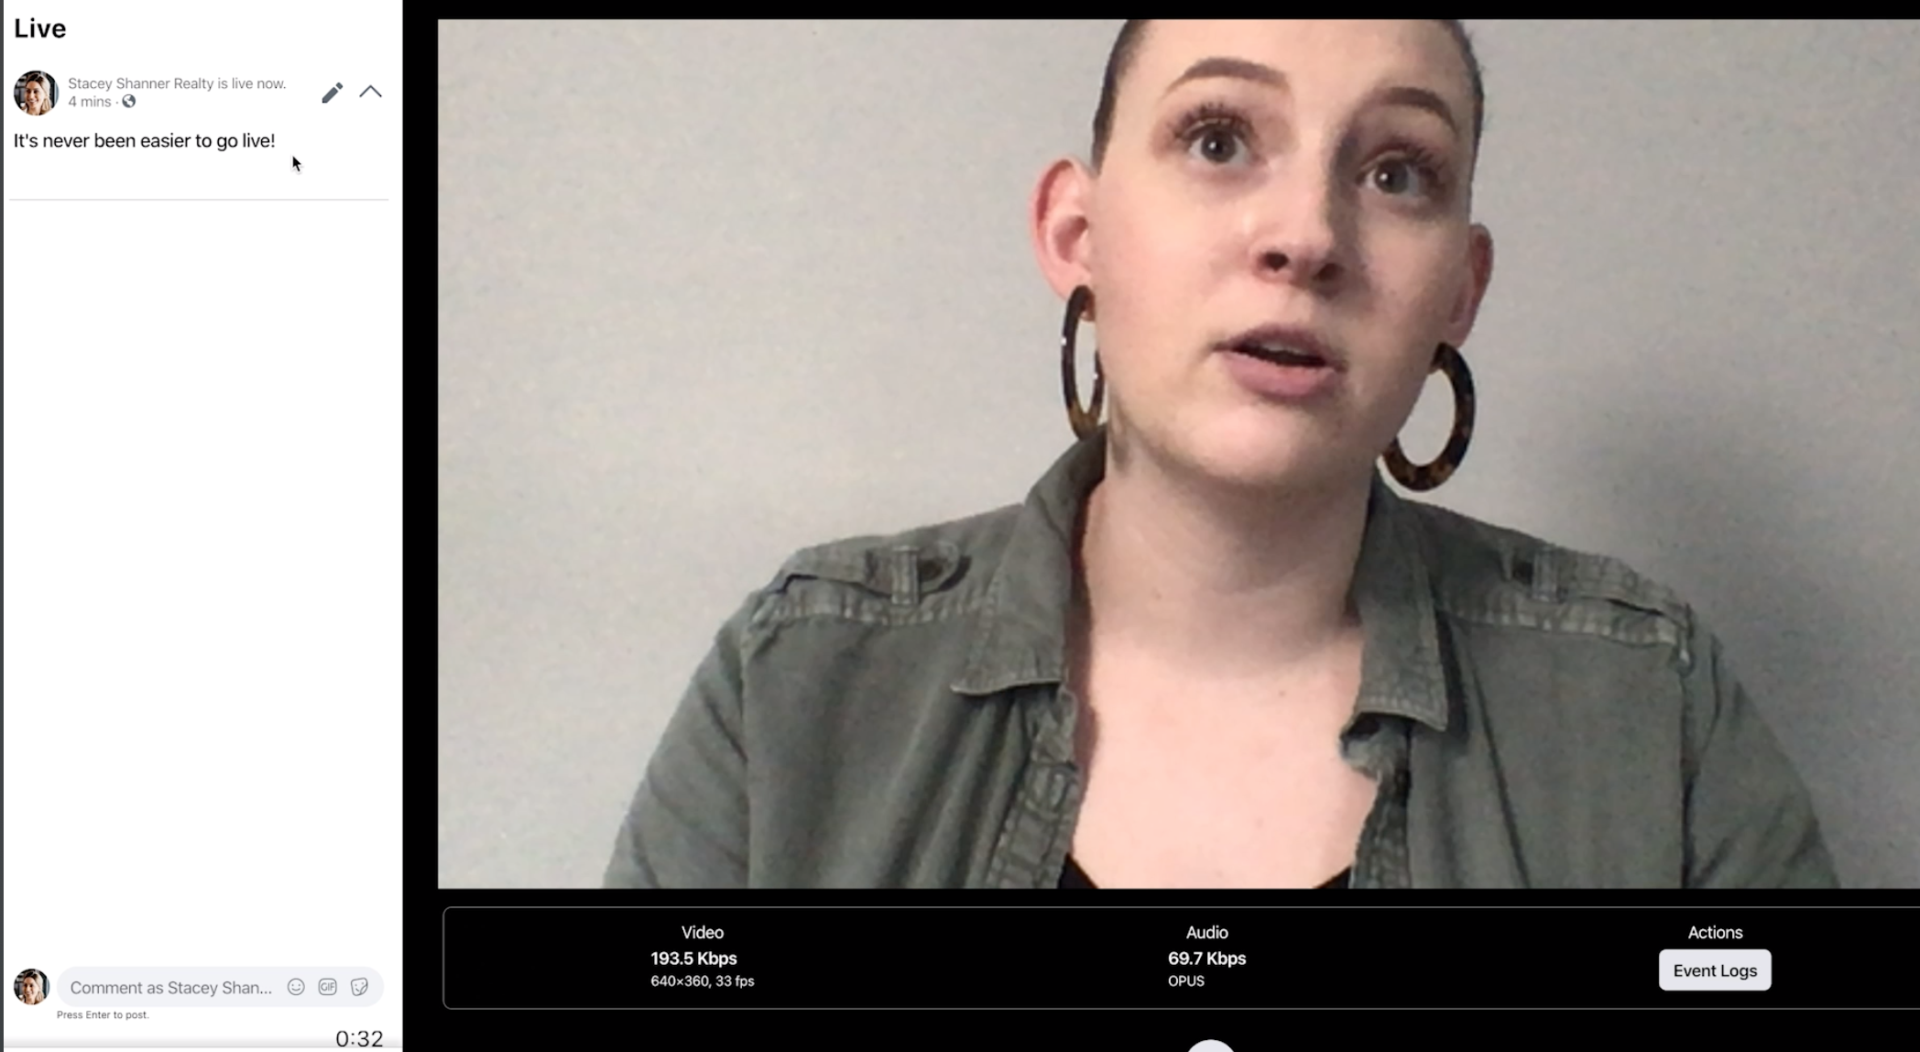
Facebook does allow you to adjust the title and description of your video after you are already Live, if need be. You can do this in the box on the left-hand side labeled Edit Post. Select the Pencil Button, and you will be prompted to edit the title or description. You can also watch as people join your Live so that you can respond to them in real time.
When you’re done, all you have to do is select the red button in the bottom right-hand corner marked End Live Video. A pop-up box will appear asking if you actually want to end your Live Video, at which time you can select Cancel or OK. Once you’ve selected OK, another box will appear allowing you to View Post or Delete Video and Return to Page. We recommend saving the post, that way if anyone missed your Live, they can go back and watch it later.
The takeaway
And that’s it! It’s so simple to go live on your Facebook business page. Make sure you subscribe to this YouTube channel. And be sure to follow us on Facebook and Instagram: @remindermedia. But, most importantly, put a pin in it.