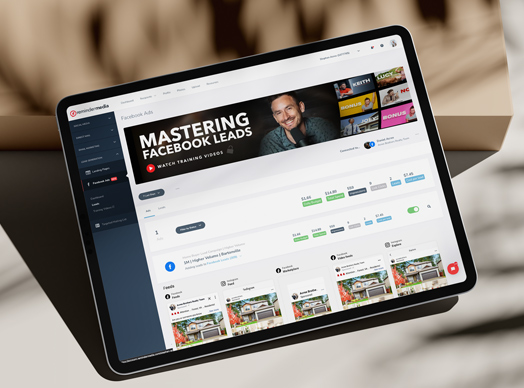
Facebook advertising, if done properly, can give real estate agents a ton of bang for their buck. You can expand your brand to as many people as you’d like. Follow these eight steps to capture leads and drive them into your funnel.
Video Transcription
Today I want to walk you through an overview of how you would set up a Facebook campaign.
Step 1. Determine the type of campaign
So the first step you got to do is you got to have a Facebook business page. So make sure if you don’t have one that you get one today. Look for the link for Ad Manager. You’re gonna get in your Ad Manager and at this point you can create a campaign and Facebook really offers three objectives for this campaign. You can focus your campaign on brand awareness. You can focus your campaign on consideration. This would be driving engagement, driving traffic. And then last but not least you can focus your campaign on lead conversion, getting someone to fill out a form, getting someone to take action.
Step 2. Select the type of ad
After you’ve chosen the objective of this campaign now you want to name the campaign and then choose the type of ad you’re trying to go after. Is it a carousel ad where it has multiple images? Is it a single image ad? Is it a video ad? Choose the type of ad you want to go after.
Step 3. Choose your target audience
After you’ve chosen the ad, now you want to choose the audience that you’re targeting. You can choose the audience, the demographic, the location, the interest, what you want to think of for this campaign is you want to think of the apartment complex you’re going after. Look at it is an apartment complex that is attracting Millennials? Is it attracting baby boomers? Who is the audience you’re going after? And then set the interests, the demographics, the age groups, to match and refine your list.
Some tips I’ll give you is on the interest you can literally target people who are likely to move. So make sure that’s one of your interests that you put on there to refine the list and then obviously you want to put the location you don’t want to be reaching people across the country. So put your location you can’t do the exact address, but you can refine your list.
Step 4. Create your ad
After you’ve set up the demographic and the audience and the interest, now you want to actually set up your ad. Now don’t get scared here you don’t have to be an ad expert, a graphic designer. It’s really simple you can upload a great image of a really attractive home that’s maybe with eye catching that would stop someone when they’re scrolling through the feed, and then you want to you know create your copy to focus on one or two things.
It’s just like your cold call campaign in a previous video, you can focus on it you know inviting them to your seminar or focus on the pain point of how hey as a renter you’re throwing your money away every year instead of investing it into equity in a home. So create copy that focuses on one of those two things.
Step 5. Decide where your ad appears
After you’ve created your ad you’re gonna have to look at where you want this ad to display what platform what technology. Do you want it on desktop, mobile? Do you want it to show on the sidebar of Facebook? I suggest you actually want it to show everywhere; the only caveat to that is that you want to look at the ad you’ve created from a copy standpoint and from an image standpoint and when you’re looking at the platform’s it’s displaying on, does it actually display well? Does the copy get cut off on the sidebar image, does the image actually shrink too much? So that’s what you want to concentrate on and that’s the only reason you would really want to exclude another platform.
Step 6. Set your budget
After you’ve chosen where you want your ad to display guys, now you need to select the budget that you want to actually spend on this ad. Now don’t panic you don’t need to break the bank. You can literally spend a dollar a day on Facebook and get results, but I suggest to my agents all the time you know don’t break the bank spend a cup of coffee: three to five dollars a day and you’re gonna want to set that budget and then set the schedule. You can leave it going and running forever or you can set it to go for a couple weeks maybe a month and set a specific
schedule.
Step 7. Review
Now after you’ve set the schedule and your budget, you’re gonna want to review your ad to make sure it’s all correct. Submit it to Facebook. It won’t go live right away; it actually has to go for approval they have to see if it meets their standards. If it meets their standards, they will probably approve it within 24 hours.
Step 8. Monitor your campaign
Then the last thing you need to do is you need to check your ad manager every day to see how your ad is performing. If the ads performing poorly you can stop it so you don’t have to be nervous so get on your ad manager every day it will show you the analytics, it will show you how many people are viewing it, how many people are clicking on it, and you can see the success of your ad.
The takeaway
So there you have it guys, there is a high-level overview of how you set up your first campaign on Facebook. If you like these tips subscribe to our YouTube channel, and check us out on Instagram and Facebook, but most importantly take action on this today.


