


The American Lifestyle digital edition is a powerful tool for staying in touch between mailings of your print magazine, but it’s also a great way to connect around important events.
Today on Put a Pin in It, Andrea Tremper shows you how to set up multiple versions of your digital edition—using the example of how this might be used after an open house.
Video Transcription
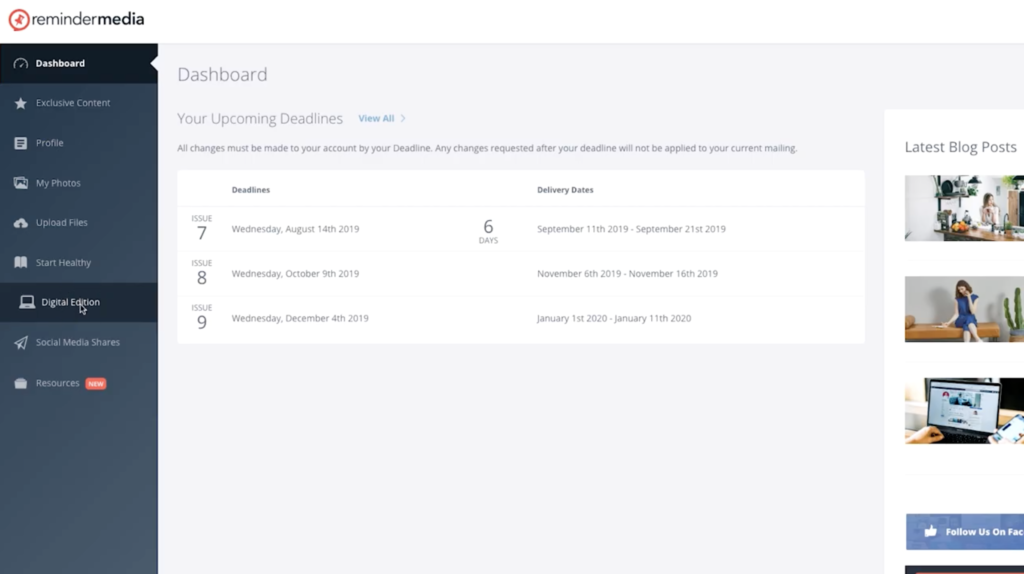
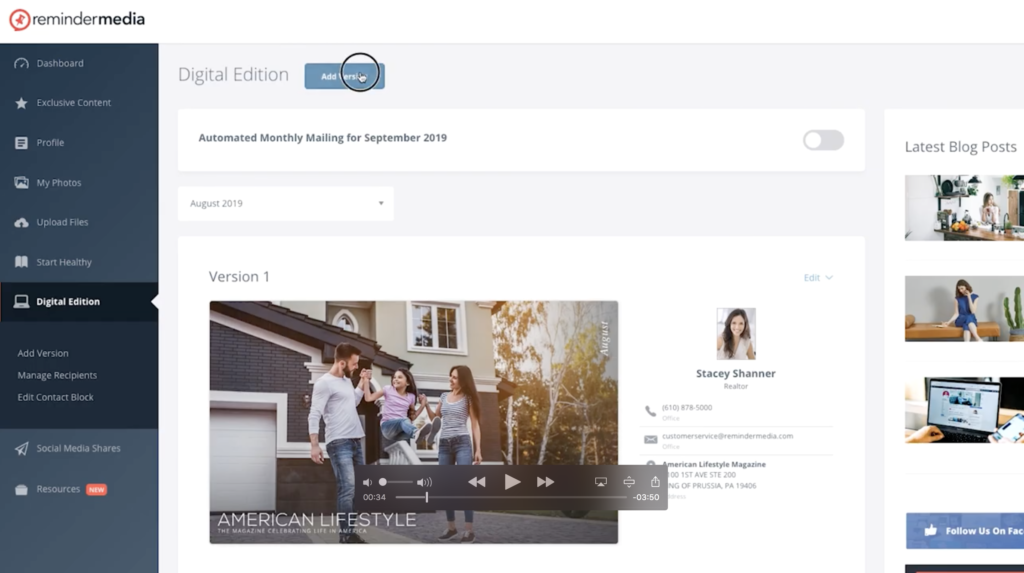
To create a new version of your digital edition, the first thing you’ll need to do is log in to your ReminderMedia account. Once you’re logged in, click the navigation menu on the left side of your account interface. From there, click Digital Edition, followed by Add Version.
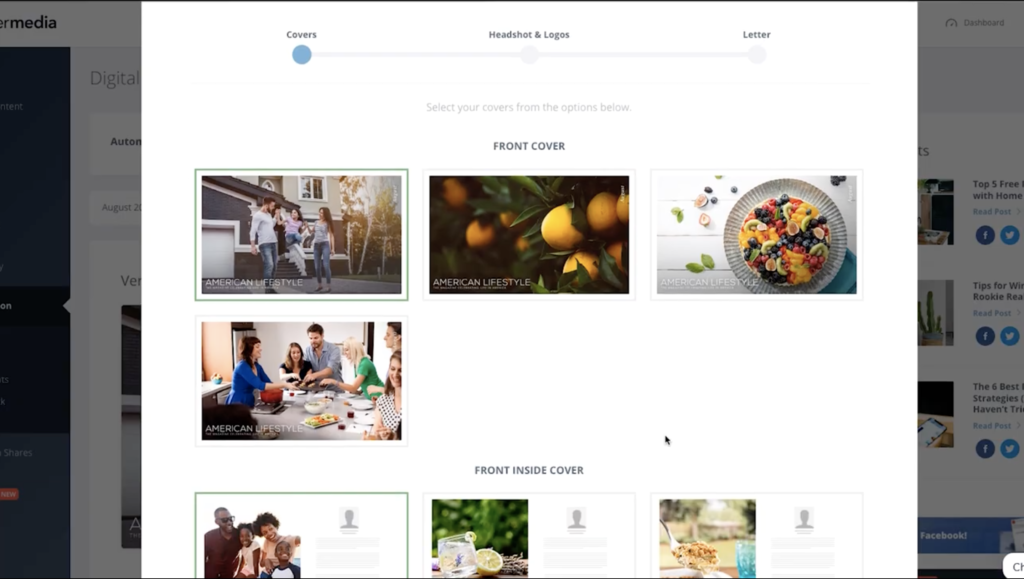
This brings up the formatting option for your digital edition, beginning with the covers. You’ll need to choose a front cover, front inside cover, and back cover from the options given. Simply click the options you want to use.
Since you’re sending to a very specific group of recipients, you’ll want to consider that audience when you’re making your choice. For example, if you’re looking to connect with people who attended your open house, you may want to go with those images that are a little more real estate focused. If you’ve just hosted an event for families in your community, try to include covers that would appeal to families.
When you’re done choosing your covers, click the next button. If at any point you need to make changes while you’re editing your issue, you can use the Back button to return to the previous screen.
Once you’ve chosen your covers, you’ll be asked to pick your headshot, office logo, and industry logo or designation. Again, you can choose from any of the options listed and click Next when you’re ready.
![]()
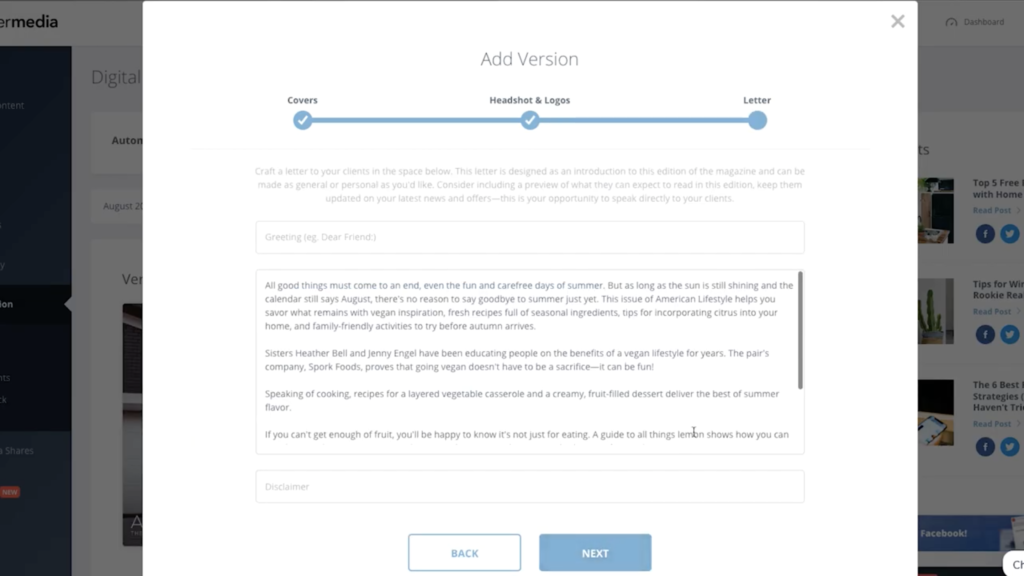
The next screen is your inside cover letter. This is your personal greeting to your recipients. You can customize the heading, the body, and the disclaimer text at the bottom. This is a great space to thank your attendees for coming to your event.
Mention that you’re sending along your digital edition as a token of your appreciation, and that you’re available if they have any questions. When you’re done updating these fields, click Next.
Congratulations! You’ve successfully set up your version of your digital edition, and now you’re ready to send it to your attendees.
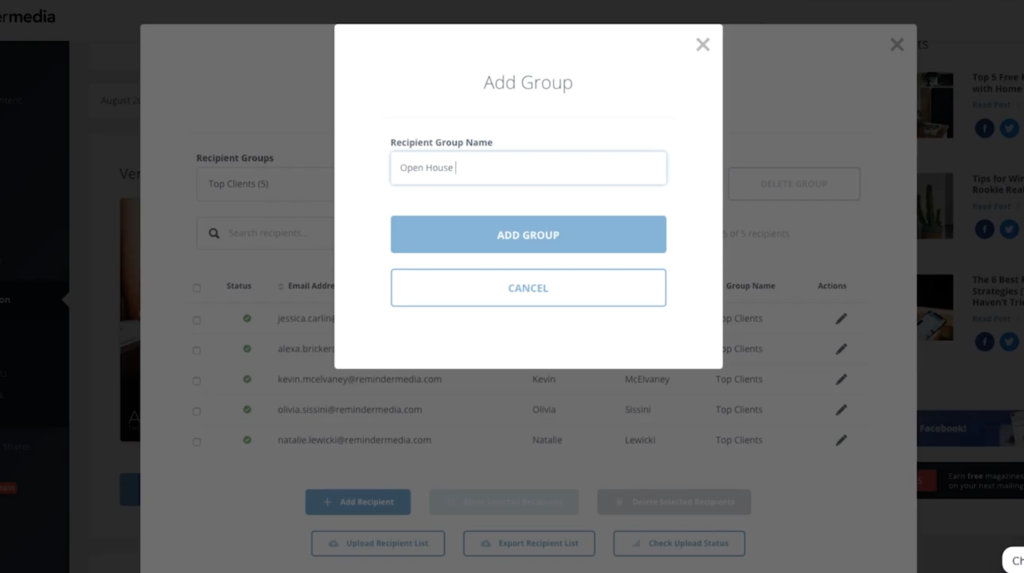
First, you’re going to need to create a new recipient group. To do this, click Manage Your Recipients from the navigation menu on the left. In the box that pops up, click the Add Group button. Under Recipient Group Name, enter “Open House,” followed by the date of your event, and then click Add Group.
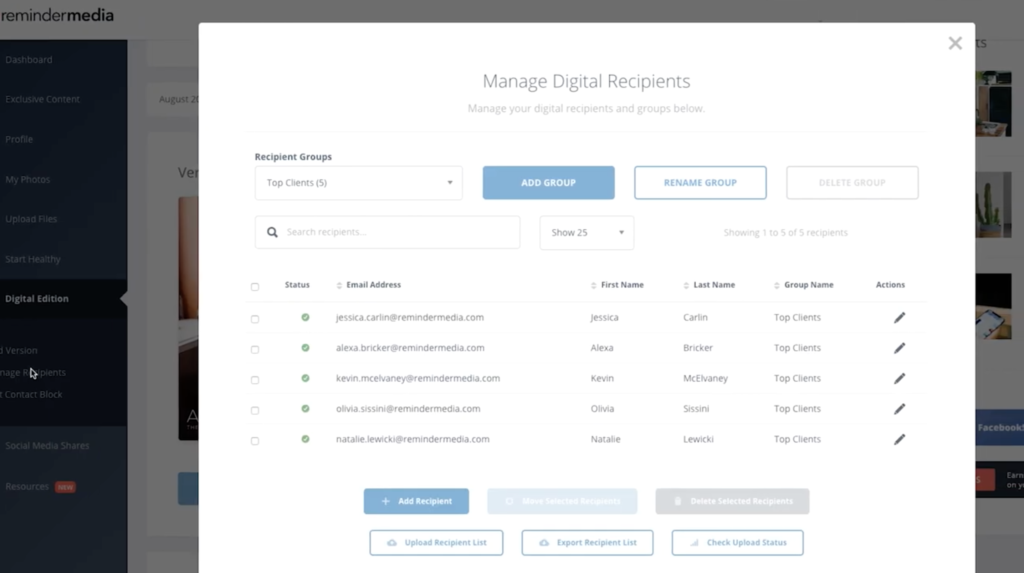
From the Manage Digital Recipients page, click the drop-down box under Recipient Groups and select your Open House group. You’ll see that your list is currently empty. To add attendees, click the Add Recipient button. Then, in the box that pops up, enter the first name, last name, and email address of one of your recipients.
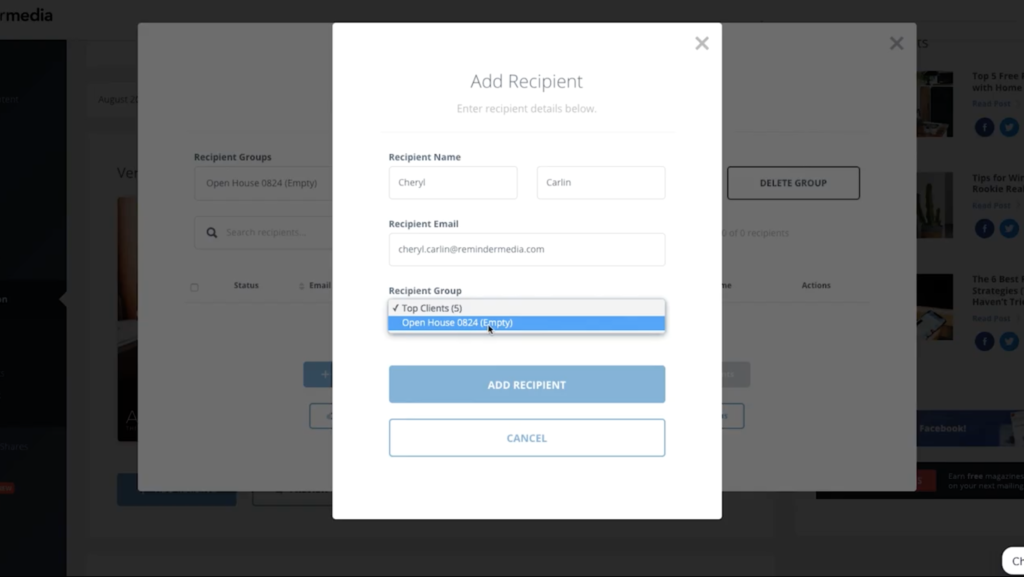
From the drop-down menu, select your Open House group, and click Add Recipient. This will take you back to the main page. As you’ll see, you now have one person in your Open House group.
You can add your recipients in one by one, using this step I just showed you. You can also create a database file of all of your attendees and upload it to your account.
In order for this to work, your file needs to have three columns for email address, first name, and last name, in that order.
[Note: Make sure that all contacts are legitimate and up to date, so that your emails have the best possible reach.]
Once you have that file, click Upload Recipient List.
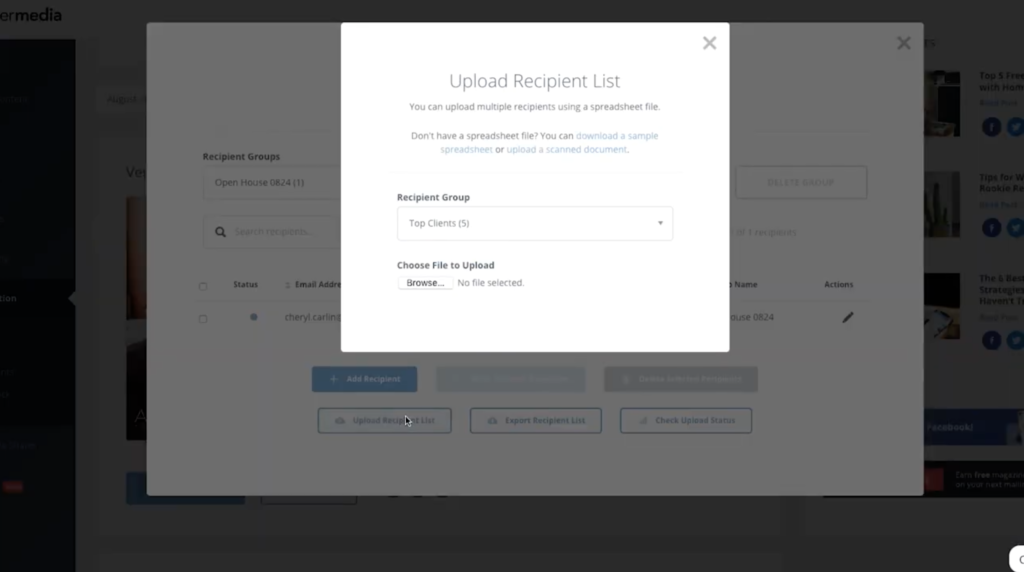
In the box that pops up, first make sure that your Open House group is selected. Then, click Choose File, find your database file, and click Choose. If your file is formatted correctly, all the names in this database will be added to your recipient group automatically.
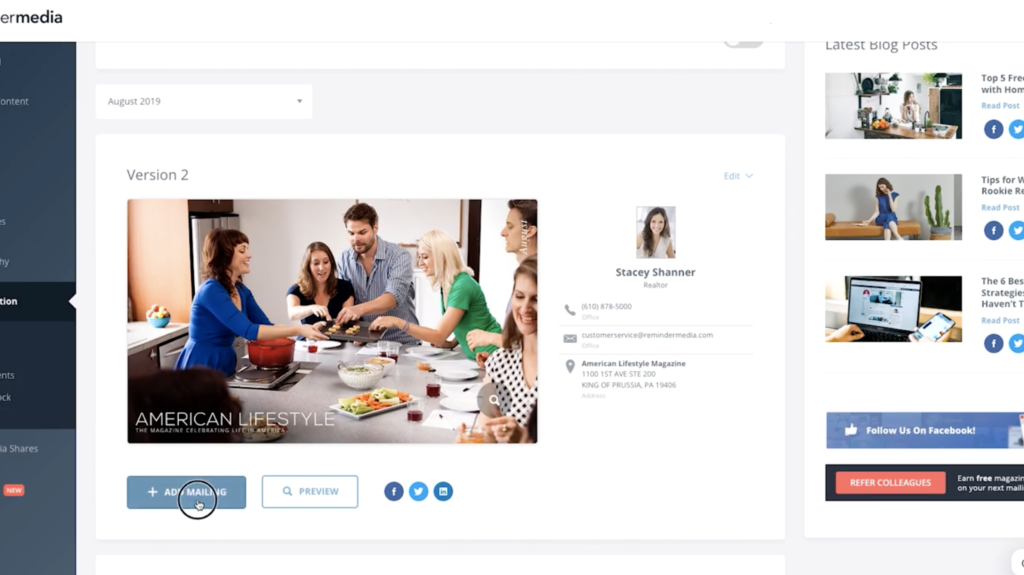
Now that you’ve created your recipient group, it’s time to schedule your mailing. Underneath your new version, click the Add Mailing button. Click the box next to your Open House group, and then click the Next button.
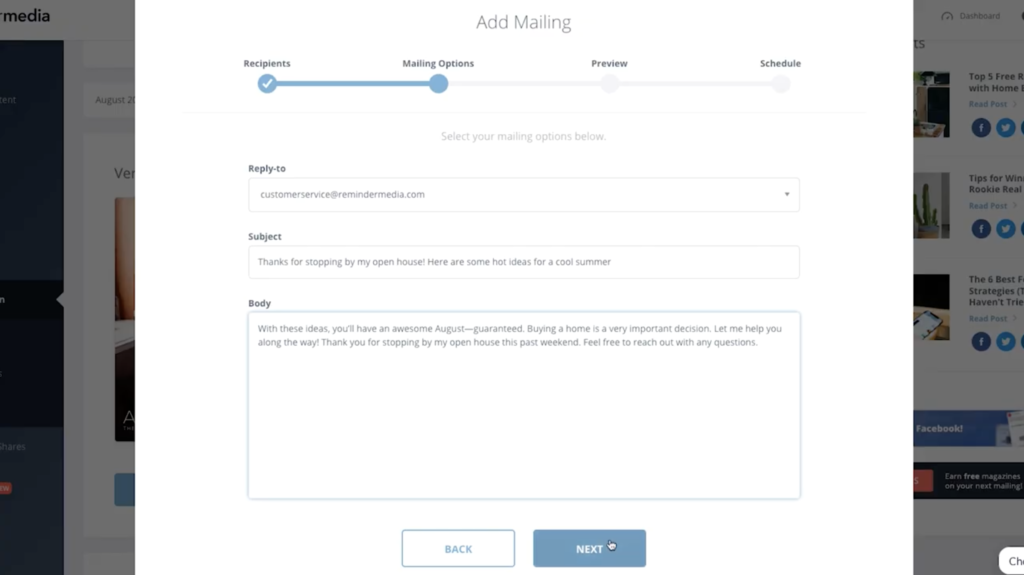
Next, you’ll need to select your mailing options. This is what your recipients see when they receive your digital edition email. You can update the “reply to” address, depending on where you’d like your recipients to reach you.
You can also update the subject line, as well as the body section. Then, in the body, you can type a short thank-you message to your recipients. Maybe give them some more information about the buying process to give them some extra value. When everything looks good here, click Next.
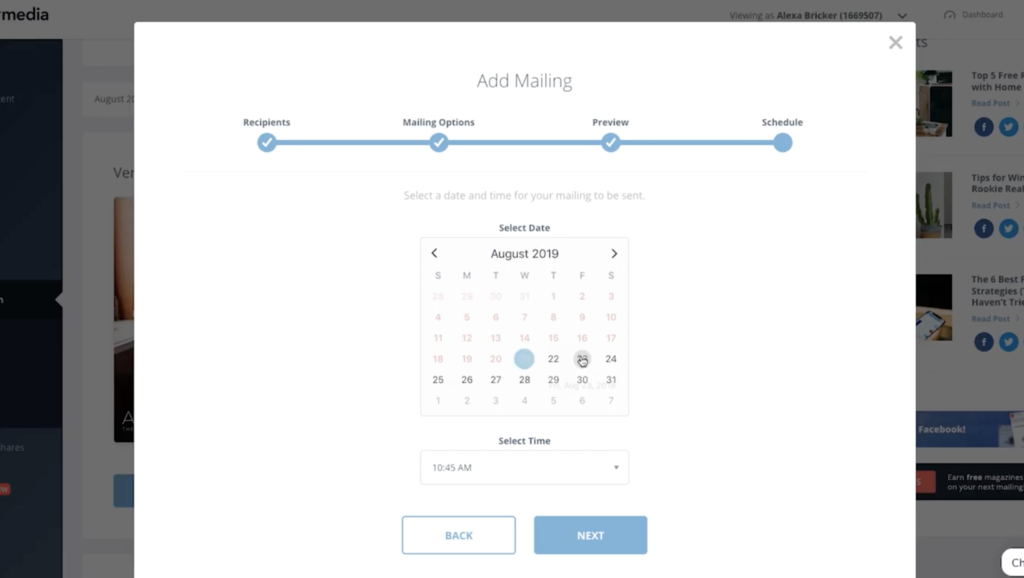
The next screen allows you to see what your digital edition email will look like for your recipients. If you want to make any changes, simply click the Back button to get to your previous screen. The last step is to just schedule the day of the month your email campaign will go out.
The takeaway
And that’s it! Your new version is now scheduled for mailing to your open house attendees. Make sure you also add your attendees to your recurring digital edition group. That way, they’ll get a reminder about your services each month in their own inbox.
If you liked this video, comment below and let us know. Be sure to subscribe to this YouTube channel for more tutorials, and click the bell icon to be notified when new videos are released. But, most importantly, take action today!