Updated April 2022
When you’re a service-based sales professional, such as a real estate agent, financial advisor, insurance broker, or lawyer, LinkedIn offers a tremendous opportunity for you to make valuable connections that will result in new business and referrals down the line. It’s hard to beat it as a place to grow awareness of your brand, establish your expertise, and hire top-notch talent to join your team.
But to take full advantage of LinkedIn’s power to grow your network of professional contacts and leads, you need to create a business page.
Whether you’re just starting out and want to create a LinkedIn small business page, or you’ve been around for a few years and are looking to improve the span and value of your reach, reviewing the focused tips and clear instructions provided here is a solid way to begin.
Building a LinkedIn business page
Before you can create a LinkedIn business page, you’ll first need to set up your individual profile. If you don’t already have a LinkedIn profile, then close this blog and check out these links to learn how to create and optimize one.
Go ahead. I’ll wait . . .
Now that you’re ready, let’s talk about how to build a LinkedIn business page.
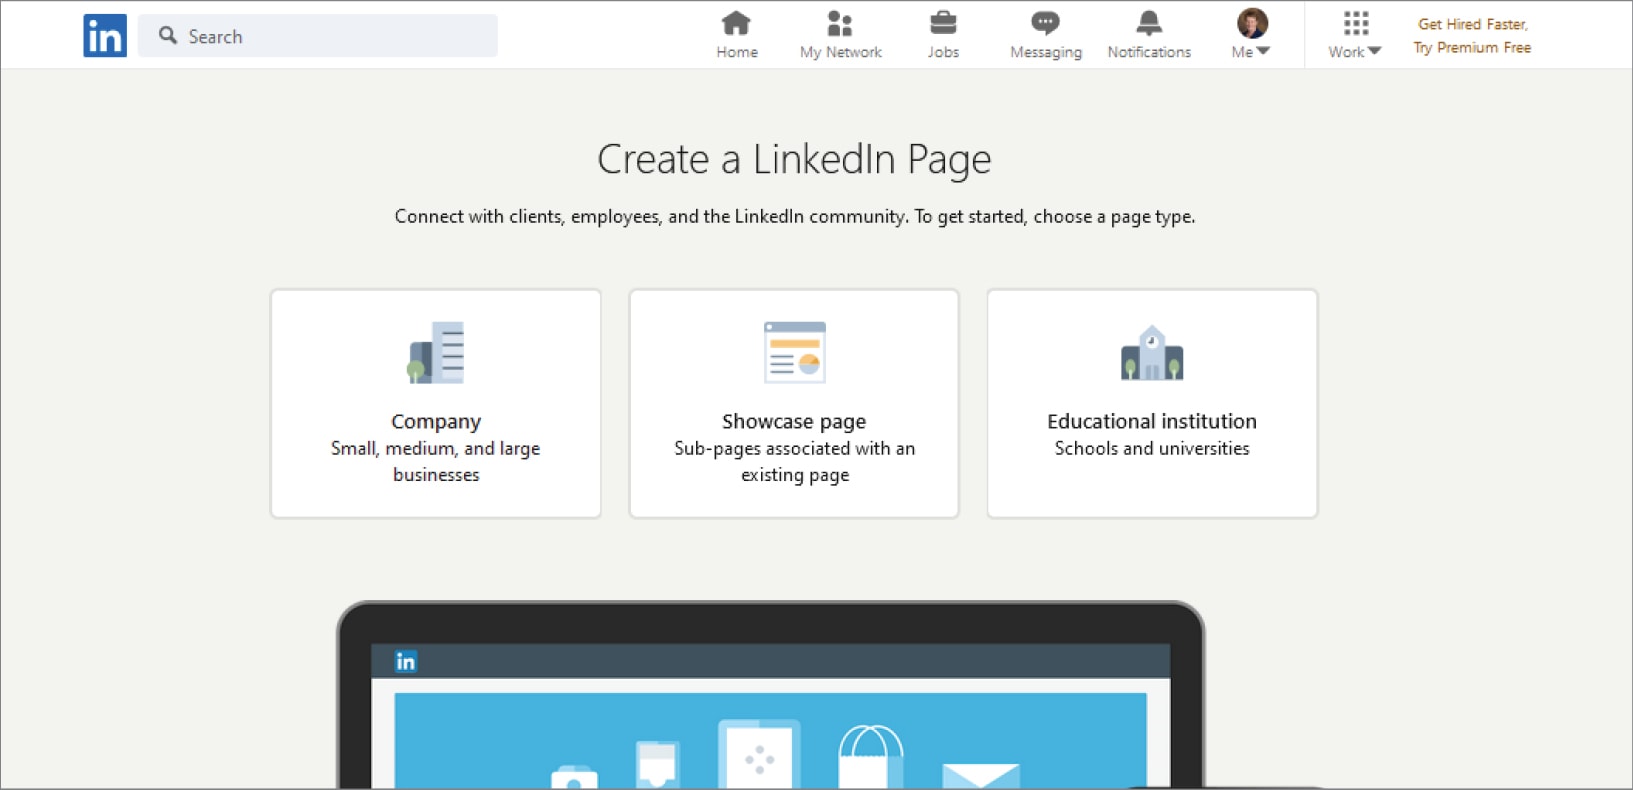
To begin, log in to your account to open your homepage. In the top-right corner of your screen, find and click the Work menu, then in the right side navigation pane that opens, you may need to scroll down until you can see and select Create a Company Page.
In the next window that opens, and based on whether you’re associated with a school or university, you’ll need to choose a business page type. (I’ve chosen Company and the remaining images in this blog will be from that selection.)
Once you’ve made your selection, you’re then asked to complete a number of fields with a variety of information that will identify your page and provide details about your company.
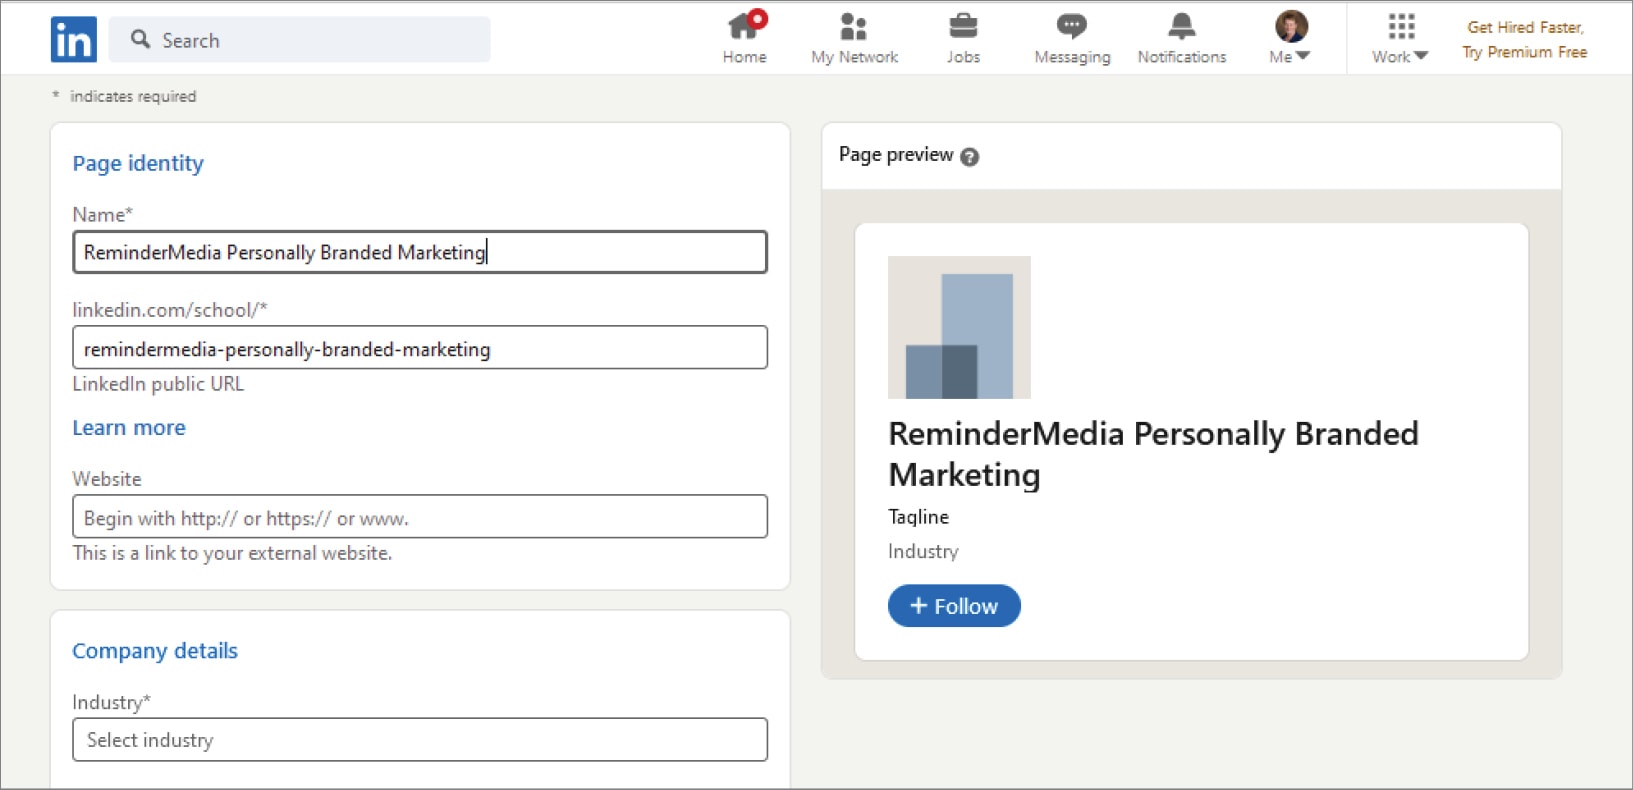
In the Name field, enter the name of your company (not your personal name).
You’ll notice that as you start to type, your company name begins to populate in the page preview on the right side and that LinkedIn automatically starts to generate a LinkedIn public URL. This is the URL visitors will use to find your page on LinkedIn, so, ideally, you want it to be the same as your handle on other platforms.
If your URL is already taken, you’ll get an error message. Try another, and do your best to select something that’s unique to your business.
The other fields are mostly self-explanatory, with a section for your website URL, along with other information about your company.
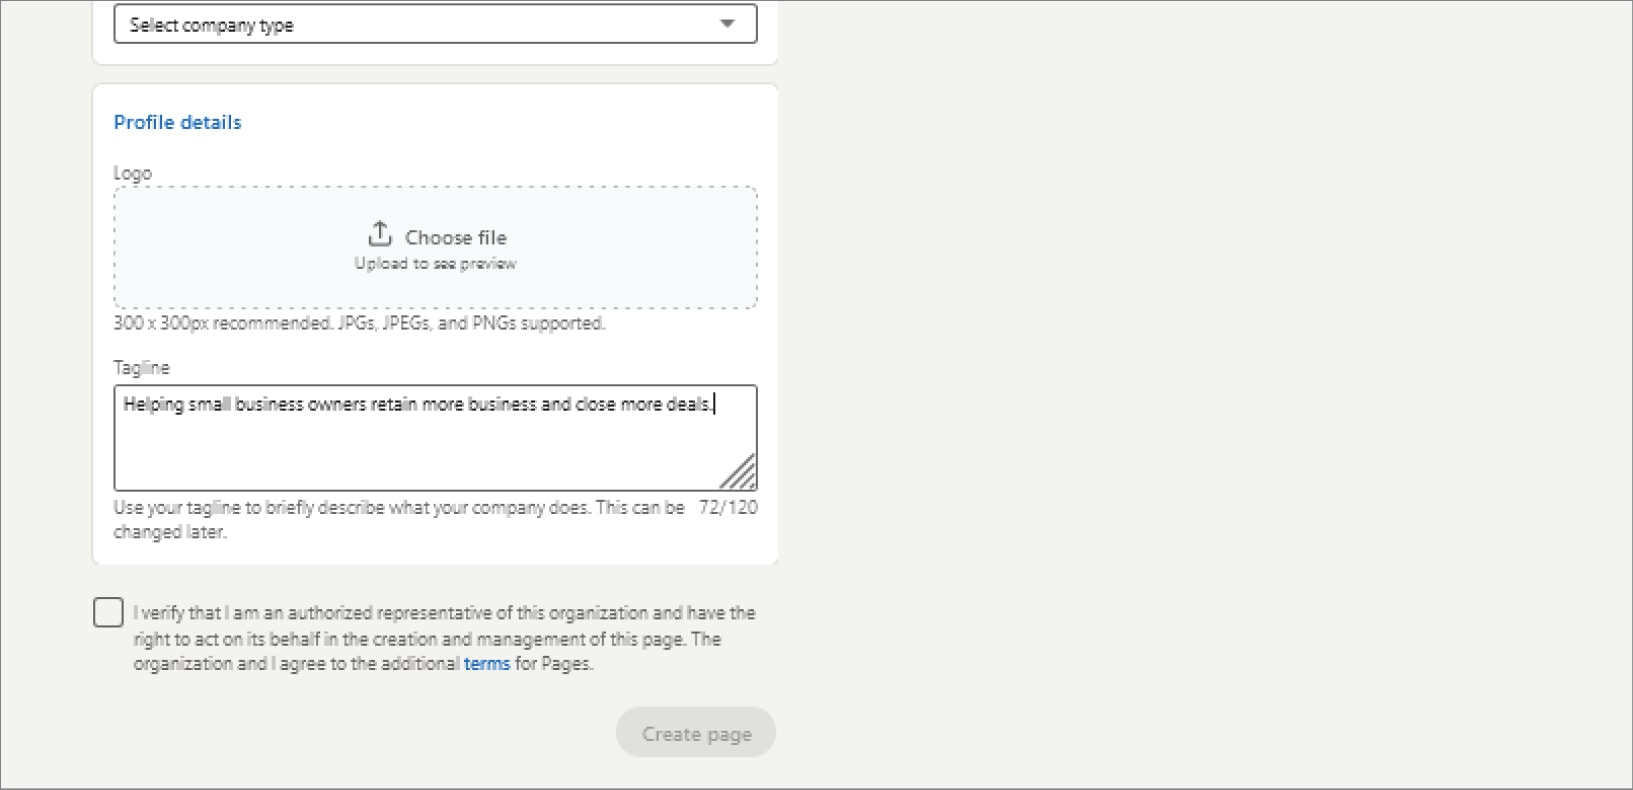
Your next step is to upload an image of your company logo.
It’s important that you start with a square-shaped image. LinkedIn recommends a 300 x 300 pixel image. If yours is bigger, don’t worry—it will automatically resize. As long as you start with a square image, resizing should not cut-off or otherwise distort your logo.
Now add a tagline for your business.
If your company has a slogan or a short description that you use elsewhere, use it here too. At this point, the Page Preview on the right side represents what users will see when you appear in their searches.
Finally, when you’ve finished entering the required information, check the box that says you’re an authorized representative of your company, and click Create page.
You are now the proud owner of a LinkedIn business page! At this point, you can customize your profile, share content, and view analytics for your posted articles. Nice job!







 Apple Podcasts
 Google Play
 Spotify

