Back to Frequently Asked Questions
How to Connect Facebook and Instagram to ReminderMedia's Social Media Automation
To connect your ReminderMedia account to a Facebook account, you first need a Facebook profile page (sometimes called a personal page). Once you have that, you can then create the necessary Facebook business page to connect your ReminderMedia account.
You can also connect your ReminderMedia account to an Instagram business page (sometimes called a business profile). It is recommended that if you want to connect your Facebook and Instagram accounts to one another, you create your Facebook business page first.
Scroll down this article to see instructions for setting up your business pages.
Connect your ReminderMedia Account to Your Social Media Pages
1. In your account, click your photo in upper right corner.
2. Click Connected Accounts.
3. Click either Connect to Facebook or Connect to Instagram.
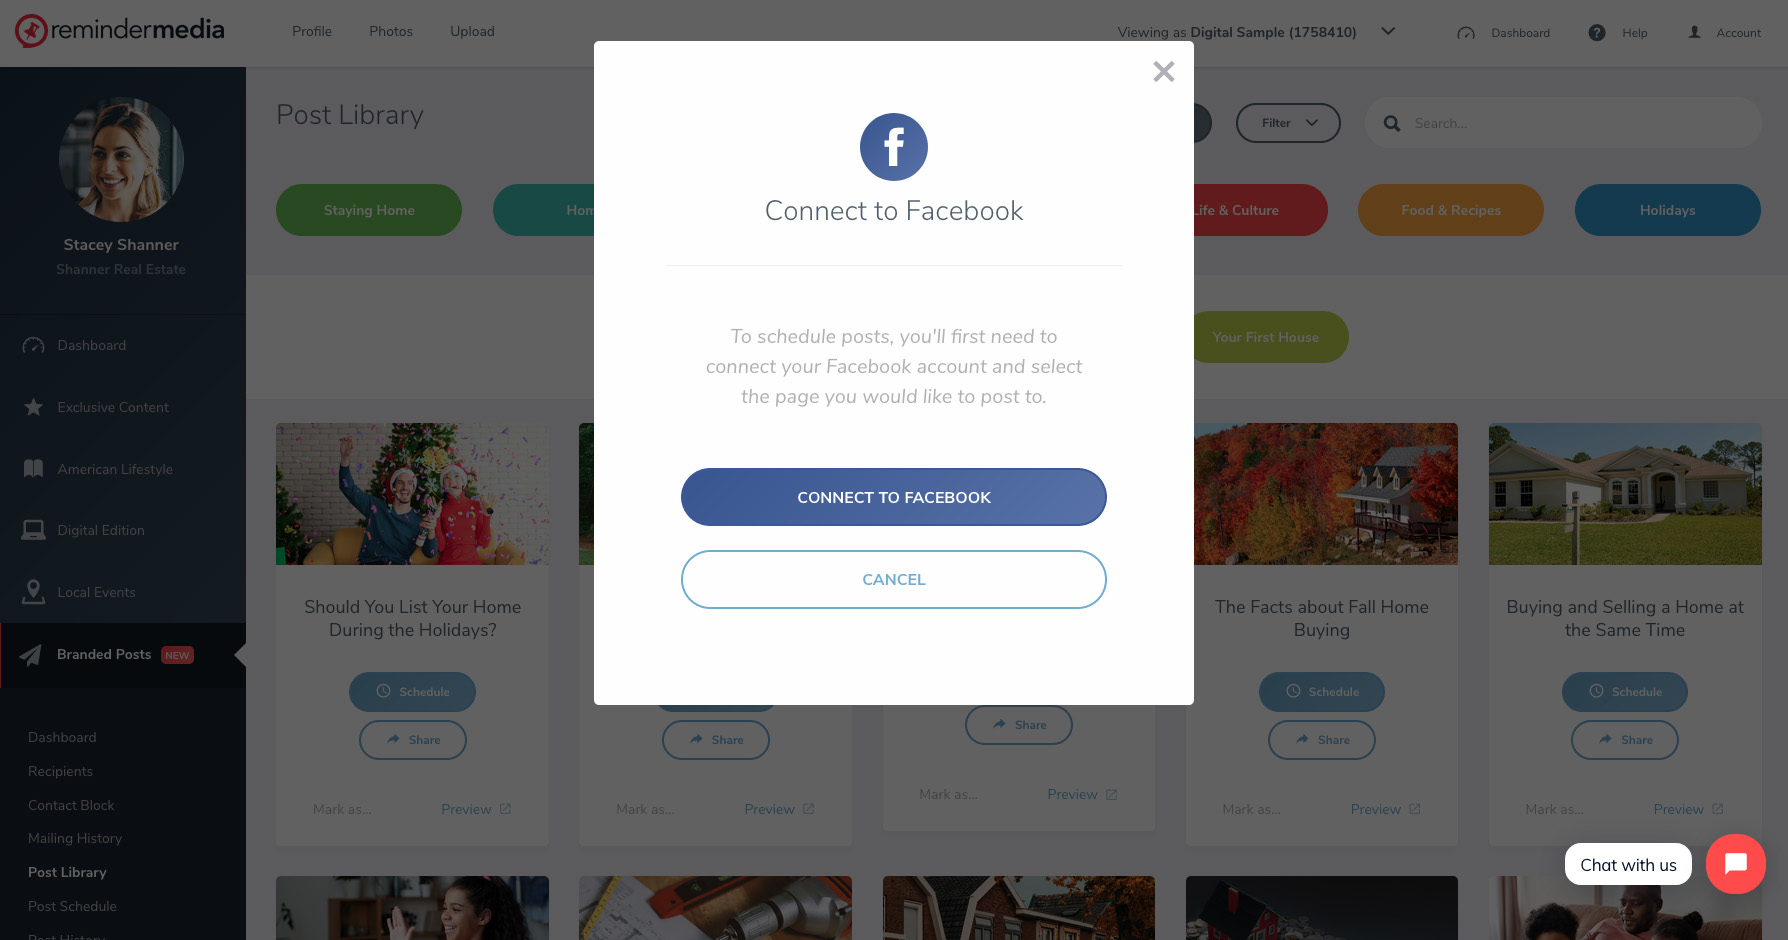
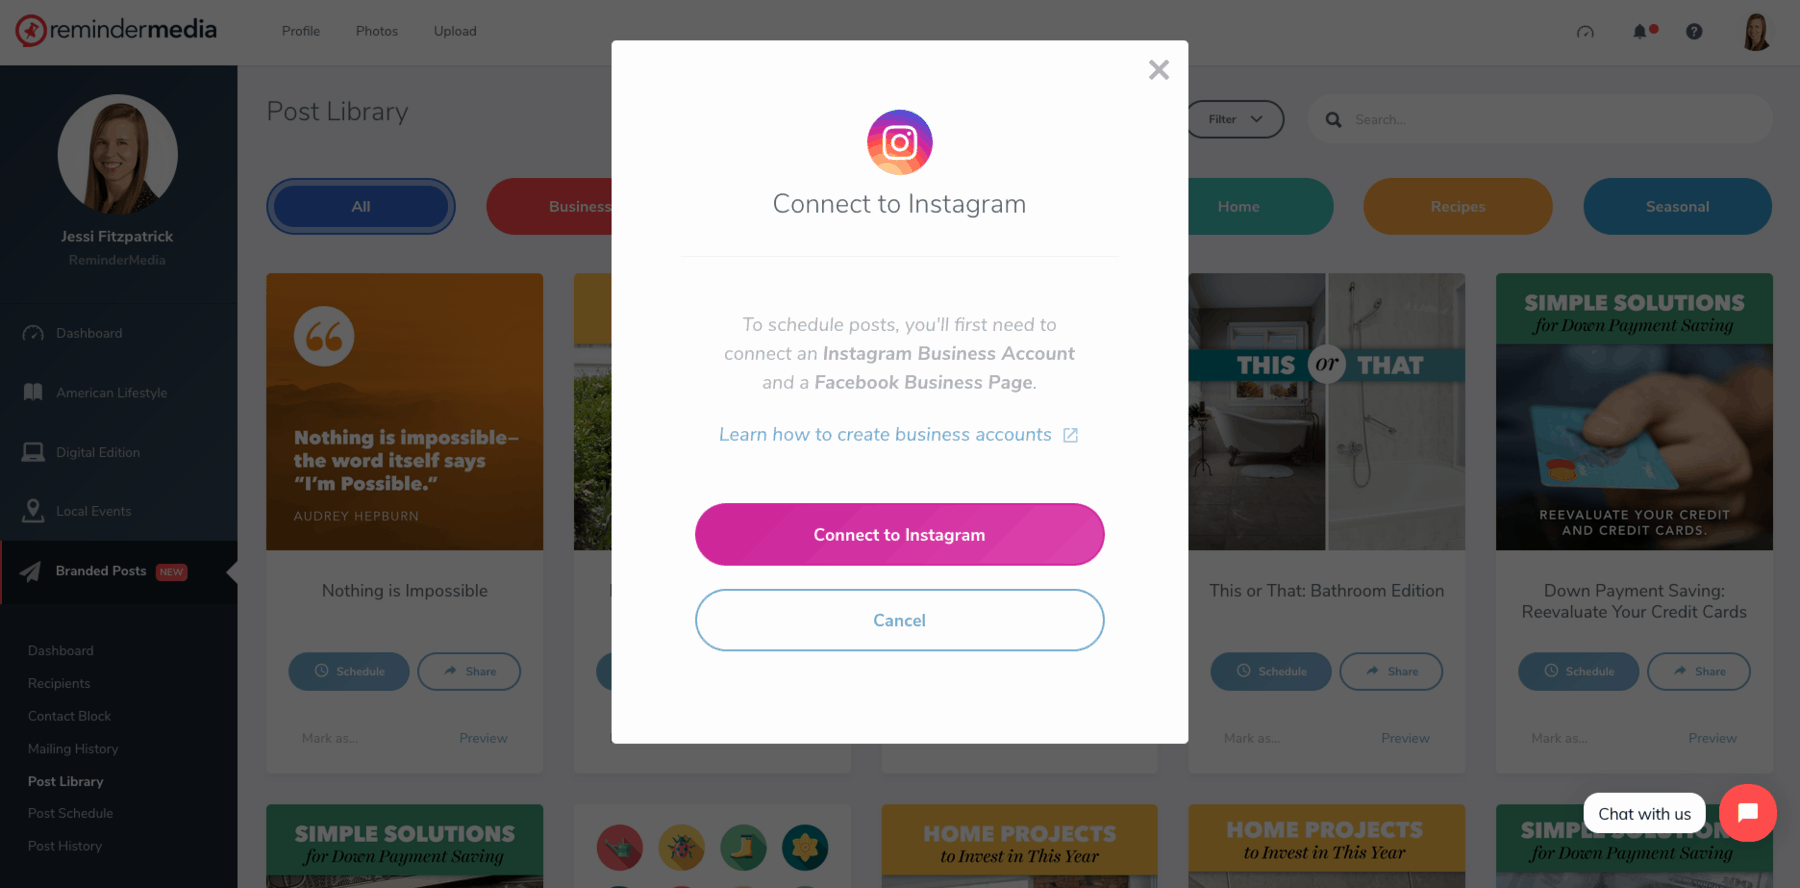 4. You will be prompted to log into your respective social media account.
5. Finally, if you have multiple pages, you’ll be asked to select the page you want to link to.
———-
Be aware that Facebook and Instagram change and test things all the time, so the screenshots below may not look exactly like what you see when you go to create your pages, but they should be close enough to get you well on your way.
How to Create a Facebook Business Page
You must first have a Facebook profile to create a business page.
1. Go to com/pages/create.
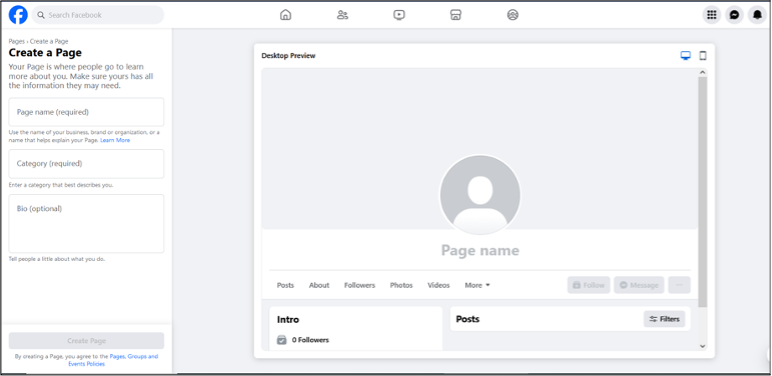
As you complete the required fields, you’ll be able to see how the information will appear on your page.
2. Page name. Enter your business name or the name people are likely to search for when trying to find your business.
3. Category. Type a word or two relevant to your industry or niche and Facebook will suggest some options. You can select more than one category; typically, three is sufficient. Just be sure the first category is the most important since that will be the first one that will appear on your page.
4. Bio. Enter information that tells people about your business.
5. Create Page. There is no Save Draft option; you must click Create Page to save what you have done so far. It’s very unlikely anyone will find your page at this point (unless you send it to them), so don’t worry that it is still incomplete.
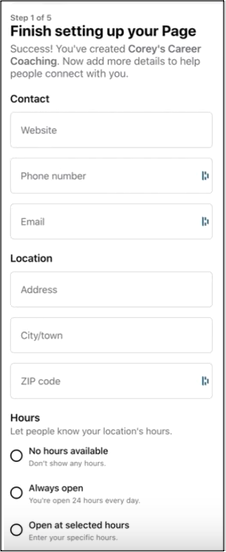
6. Finish setting up your Page. Complete the Contact, Location, and Hours sections. While this information is optional, visitors to your page will need to have this information to contact you. When you’ve completed these sections, click Next.
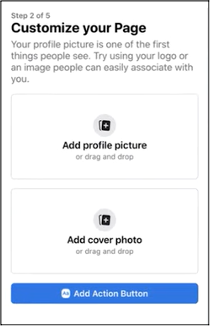
7. Customize your Page. Add a profile picture, which is the image that will appear in the circle. If yours is a personal brand, strongly consider adding a headshot. Also add a cover photo, which will occupy the larger area and appear at the top of your page.
8. Add action button. Every Facebook business page will include a Message button, but you also have an option to add an additional action button. Click Add Action Button then Try It. Facebook provides a list of action buttons you can choose from. Depending on the option you choose, you’ll be prompted to enter additional information. When you’re done, click Next.
9. Connect WhatsApp to your Page. This is optional.
10. Invite friends. When you do this, people will start to see your page. Invite only those people that you know will like and engage with your content. You’re page will experience better performance if you have 10 actively engaged people rather than 100 people who say, “Yeah for you!” and never visit your page again. After you’ve finished inviting people, click Next.
11. Stay informed about your Page. These are optional settings. If you select “Page notifications on your profile” and are logged into your Facebook profile page but not your Facebook business page, you’ll still receive notifications on your profile relevant to your Facebook business page. If you are new to Facebook, you may want to also select “Marketing & promotional emails about your page” to receive some helpful tips for using and optimizing your page. When you’ve made your choices, click Done.
12. Take tour. You’ll probably want to click this button to become familiar with your page.
There are two more actions you’ll likely want to take, but that Facebook doesn’t directly prompt you to complete.
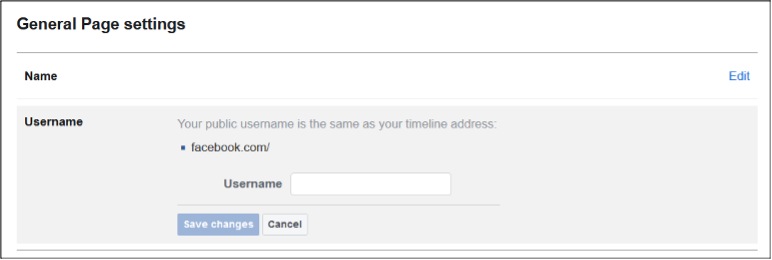
13. Create username. From your business page, click Settings to be brought to General Page settings where you can create a username. Click Edit next to Username and enter a username that, if available, will become a part of your Facebook business page URL. (If a username is not available, Facebook may prompt you to try others.) Click Save. You can now send this link to people so they can easily access your page.
14. Switch between Facebook pages. If you click your small profile picture in the upper right corner, you’ll be able to switch between your Facebook business page and your Facebook profile page or other Facebook business pages you may have.
To create an Instagram business page (a.k.a. business profile)
If you don’t already have an Instagram account
1. Create Username. Download the Instagram app onto your mobile phone and pick a username for your new account. Any spaces you add will be replaced by an underscore, and if your username is not available, Instagram will suggest others to you. Click Next.
2. Create a Password. When finished, click Next.
3. Welcome to Instagram. Provide an email address and phone number. Click Complete Sign Up.
If you already have an Instagram account and want to turn it into a business account
1. Open the Instagram app on your mobile phone.
2. Tap the small circle icon in the lower right corner. This will take you to your user profile.

3. Tap the three lines (also called the hamburger menu) in the top right corner.
4. Select Settings, then Account.
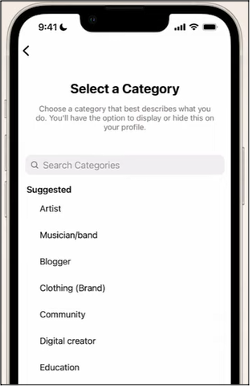
5. Scroll down to select Switch to Professional Account, then swipe the screen to see the various benefits of having a professional account until you come to the screen titled Select a Category.
6. Choose a category and use the toggle switch if you wish to display your category on your profile. Click Done.
7. On the next screen, select Business. Click Next.
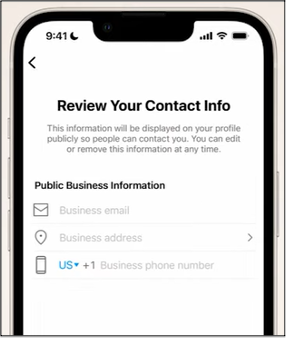
8. Add your contact information on the next screen, and Instagram will place buttons on your profile. And because most people use their phones to view Instagram, they can click to get directions to your business and call you from within the app. Click Next.
9. Next, you can decide to link your Instagram business page to your Facebook business page. (This is why you want to create your Facebook business page first.) Click Log in to Facebook, or skip this page.
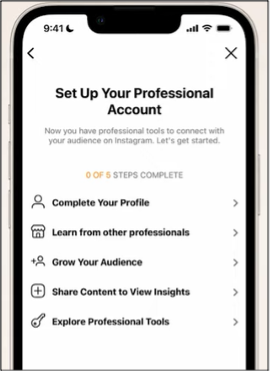
10. The next screen takes you through various steps to better understand your Instagram business page. You can review these when you wish, but right now select Complete Your Profile to add your profile picture, website, and short bio. (Your username should already be populated.) Finish and your Instagram business page is complete.
