How to Add or Remove Local Event Recipients
1. Log into your account and select Recipients on the left-hand sidebar.
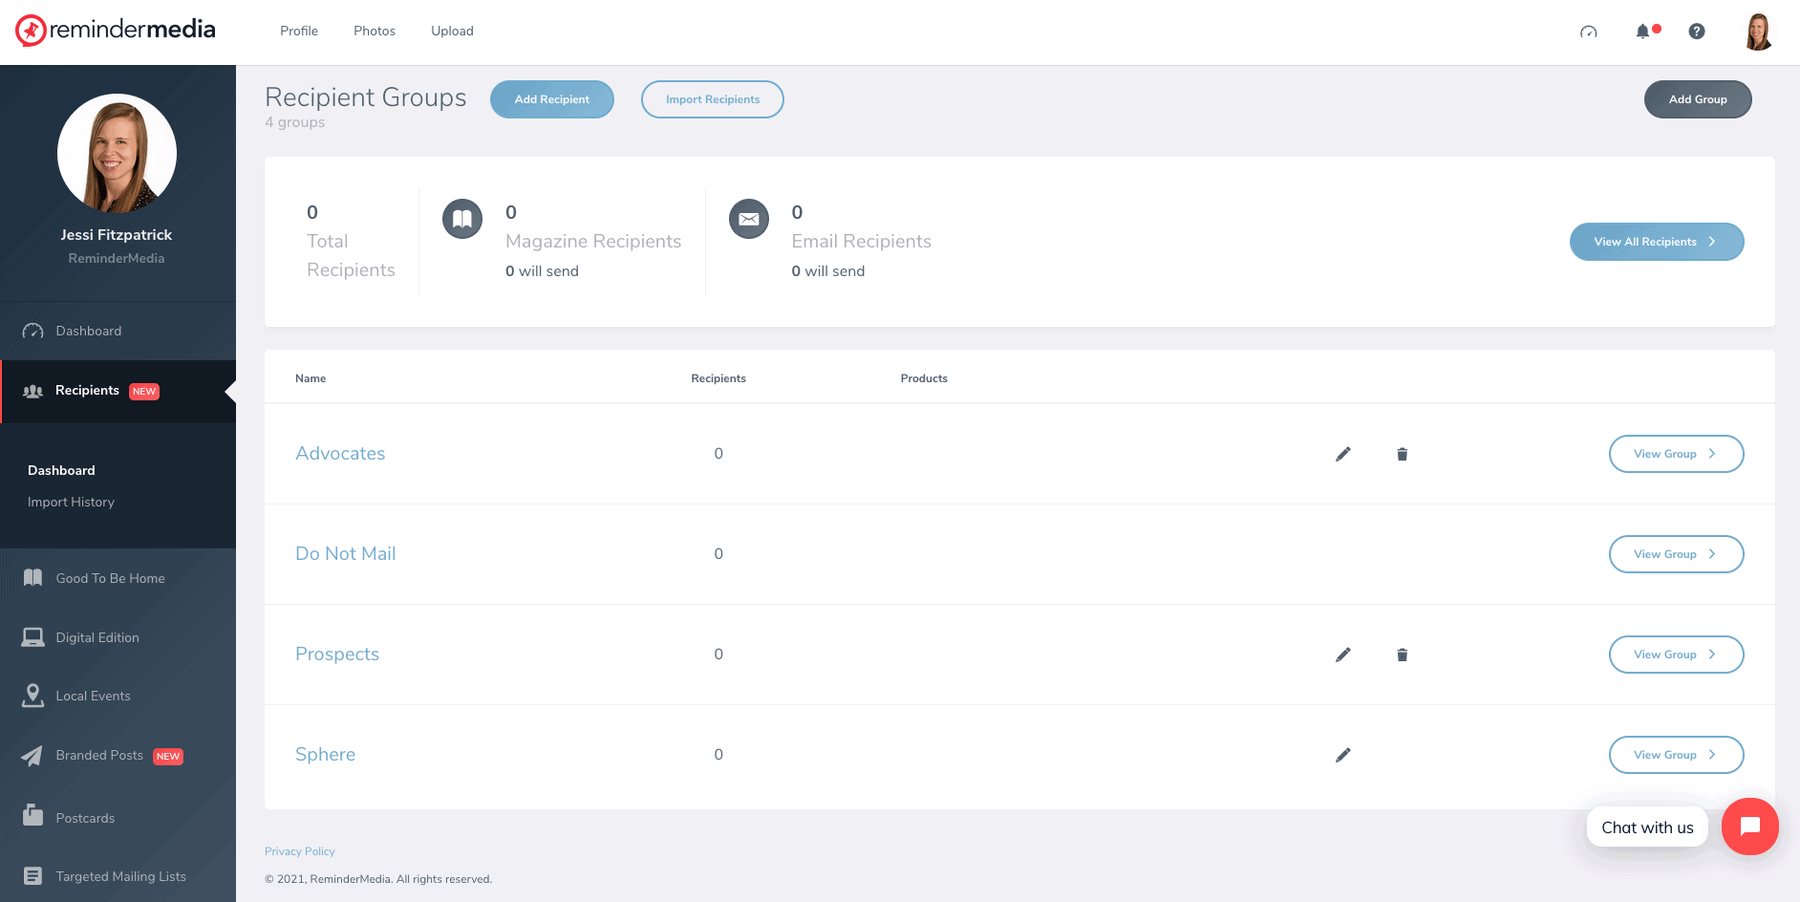
2. Here you will see an overview of your Recipient Groups as well as how many Recipients will receive the magazine or emails.
3. Make sure you have the Recipient Group created for the recipients you are adding.
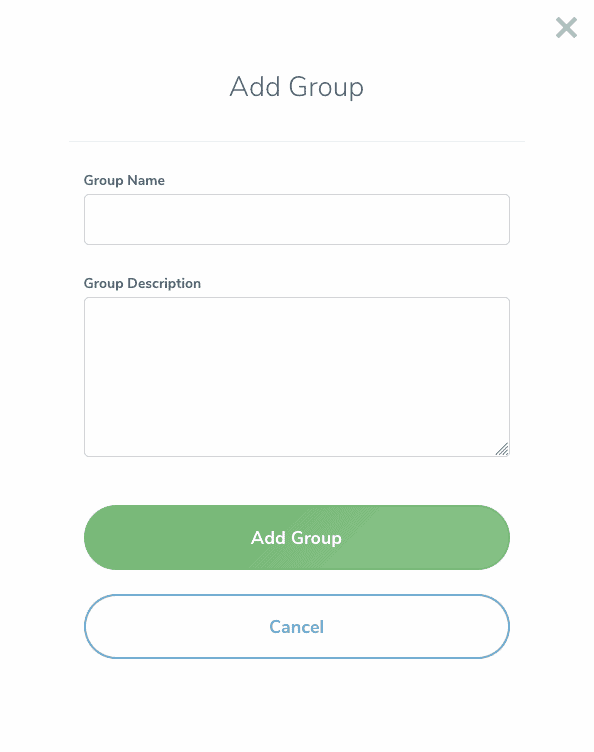
4. To create a group, click Add Group at the top right of the page. Name your group and select Add Group.
5. Click Add Recipient at the top of the page. You will be directed to a page that allows you to fill out your new recipient contact information, including their name and mailing information. The Show All Fields button at the bottom of the page will give you more information you can fill out (optional).
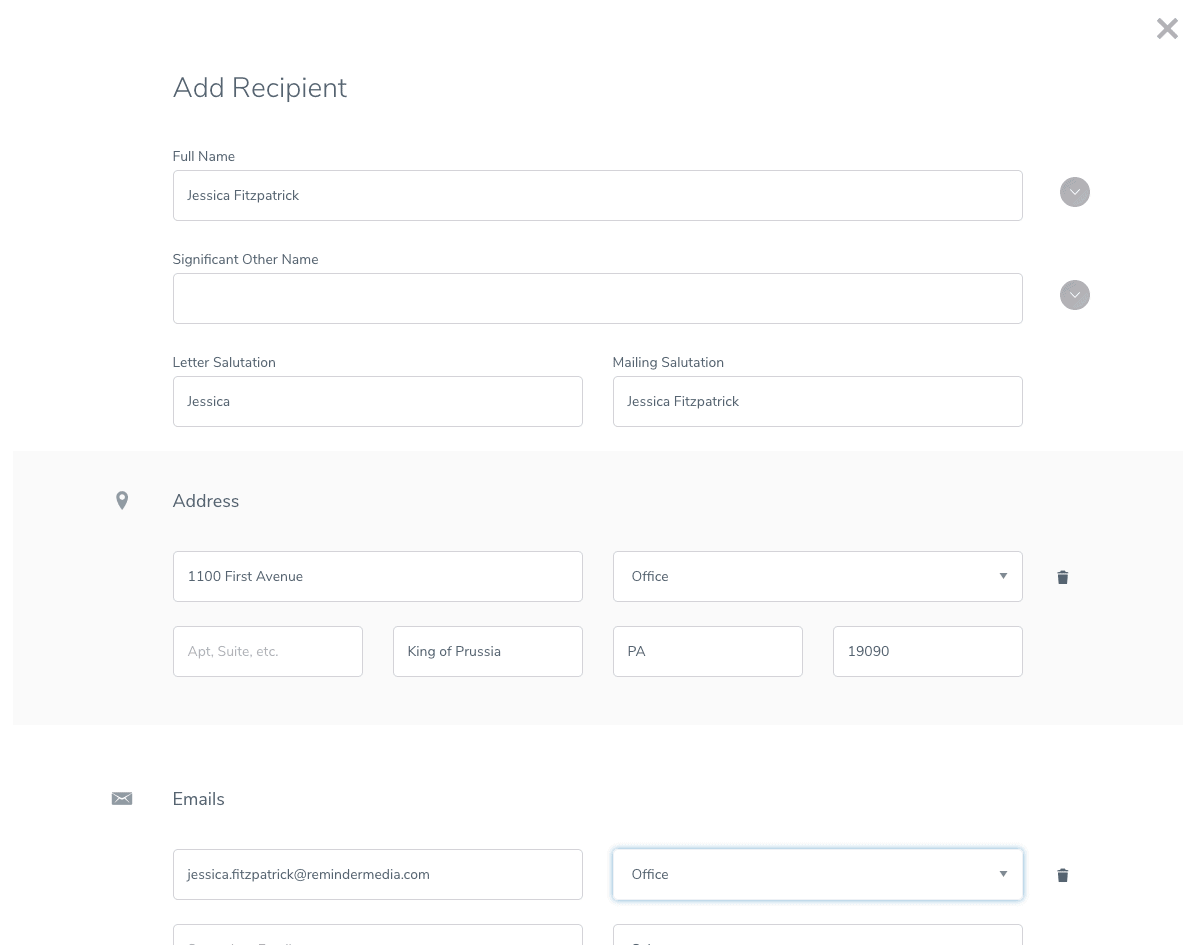
6. At the bottom of the form make sure to select the Recipient Group from the dropdown, which allows you to select the specific group you want to add your new recipient to.

7. Select the group you want and click the Save & Close or Save & Add Another button at the bottom of the page.

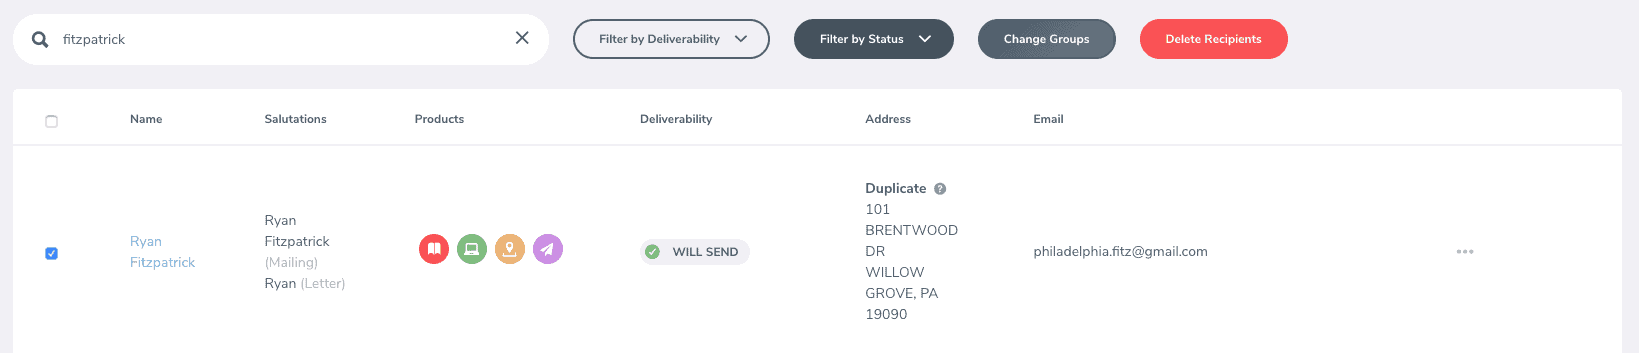
8. Your recipient’s address will not go through our email verification system and will then show the Deliverability Status. You can learn more about statuses and filters here.
9. To upload a list for your Local Events, you can see step-by-step instructions here.
10. Now that you have your list or lists ready to go, navigate to your Local Events in the left-hand sidebar.
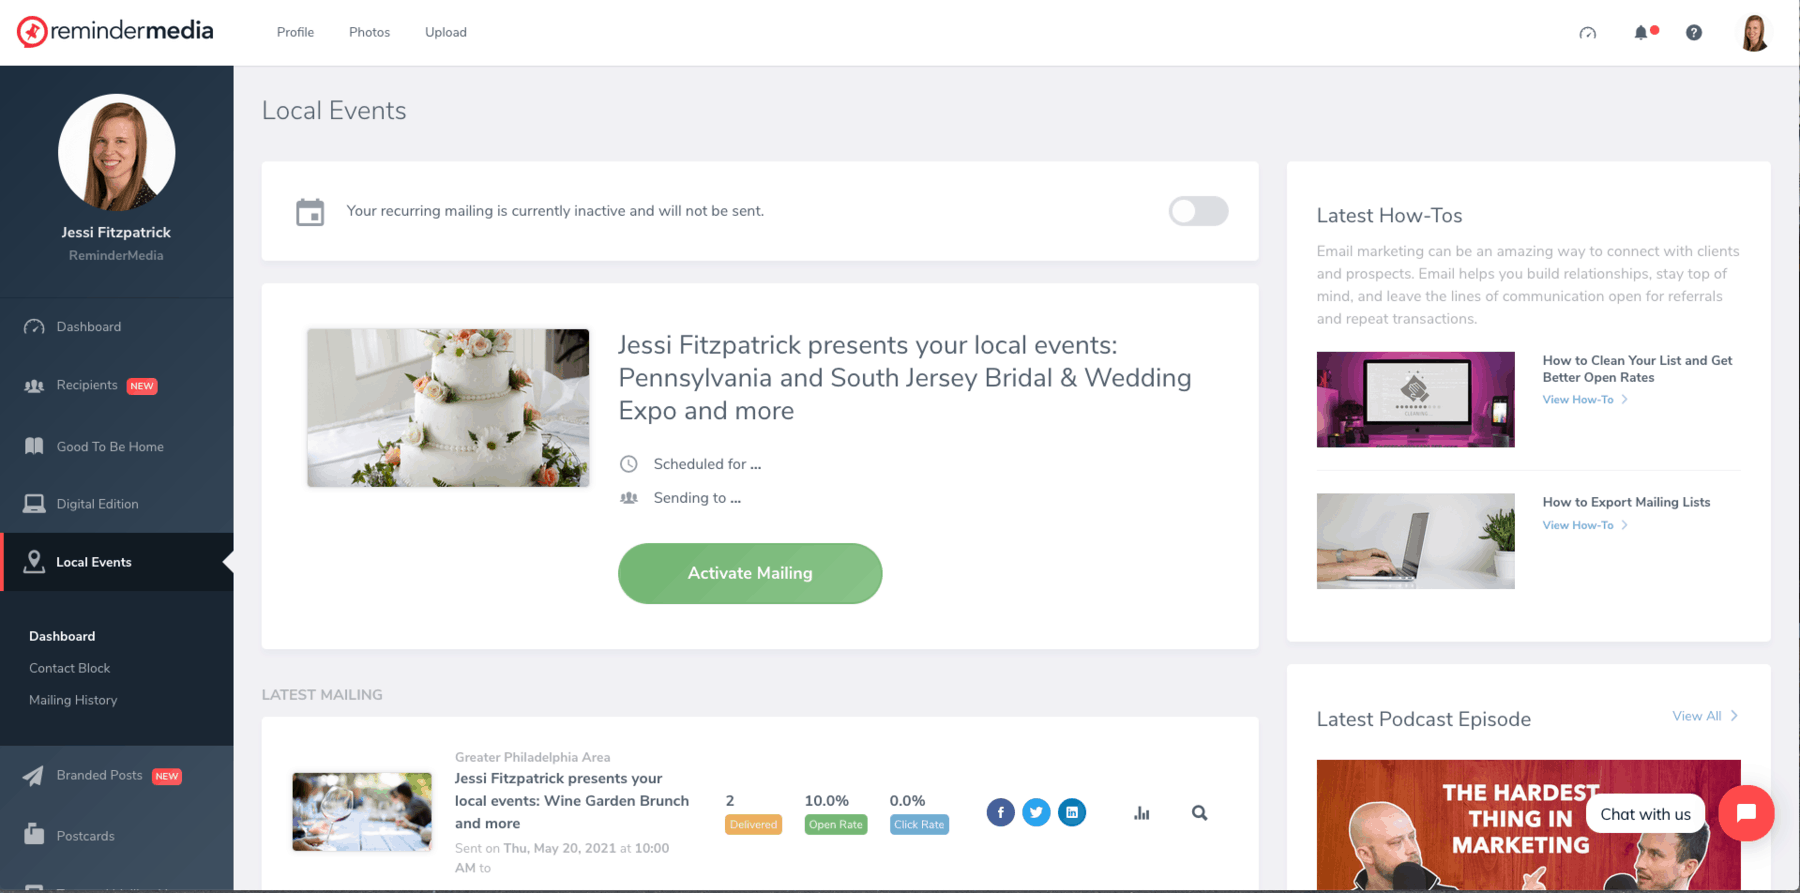
11. You can either click Activate Mailing or Edit Mailing if you already have a mailing created.
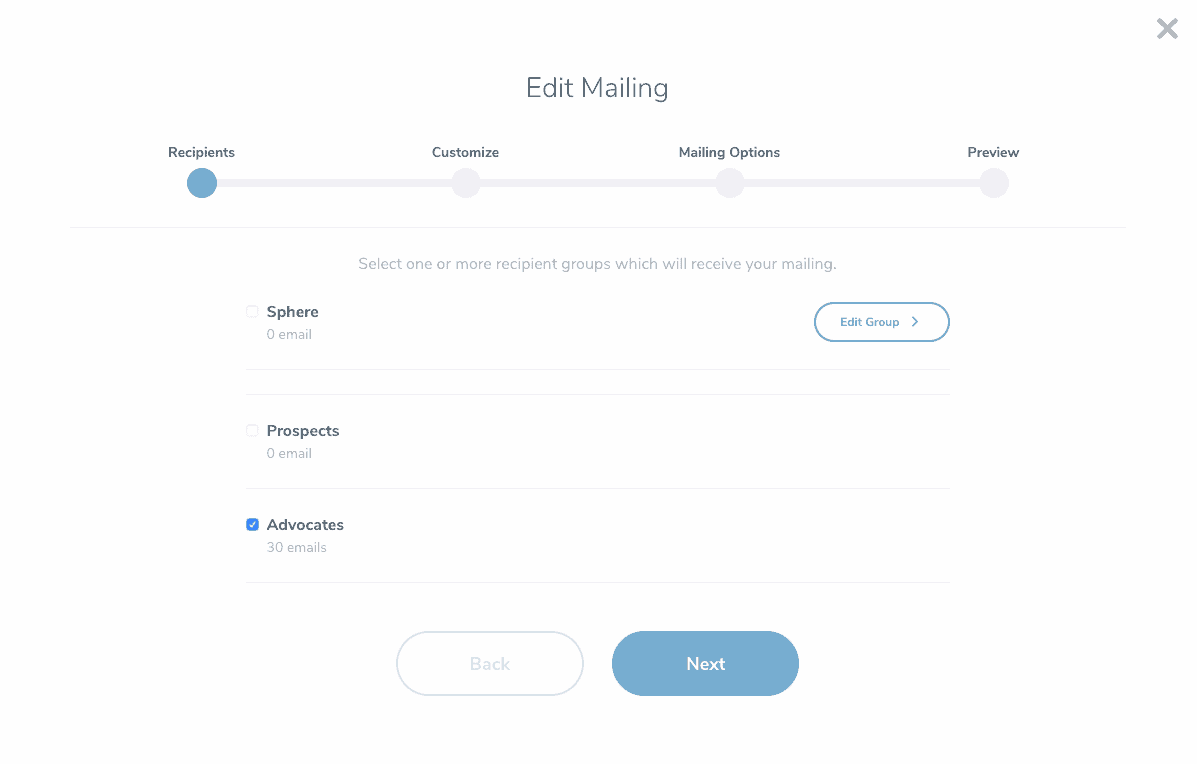
12. Select the Recipient Groups you wish to send to, customize your mailing, set your mailing options, and preview your mailing before it goes out.
13. You will now see the Local Events product icon next to any groups you added on the Recipient Dashboard.

How to Remove a Recipient from your Local Events
1. You can easily remove recipients from receiving your Local Events.
2. Navigate to your Recipient Dashboard by clicking Recipients in the left-hand sidebar.
3. You can move a recipient from a Local Events group by clicking on View Group. Next find the recipient and click the box on the left-hand side of their name. Now at the top of the page click Change Group. You can move them to Do Not Mail or a group with other products.