
 Spotify

Are you looking to launch an engaging, targeted Facebook ad for your open house, listing, or other product or service?
Today on Put a Put a Pin in It, Andrea Tremper gives step by step instructions for creating an effective targeted ad that will really get results.
Video Transcription
Whatever line of work you’re in, one of the best reasons to have a Facebook business page is the ability to run targeted ads. Today, I’m going to show you exactly how to run an effective open house campaign. But, even if you don’t work in real estate, you can apply these lessons you learn today to your own business.
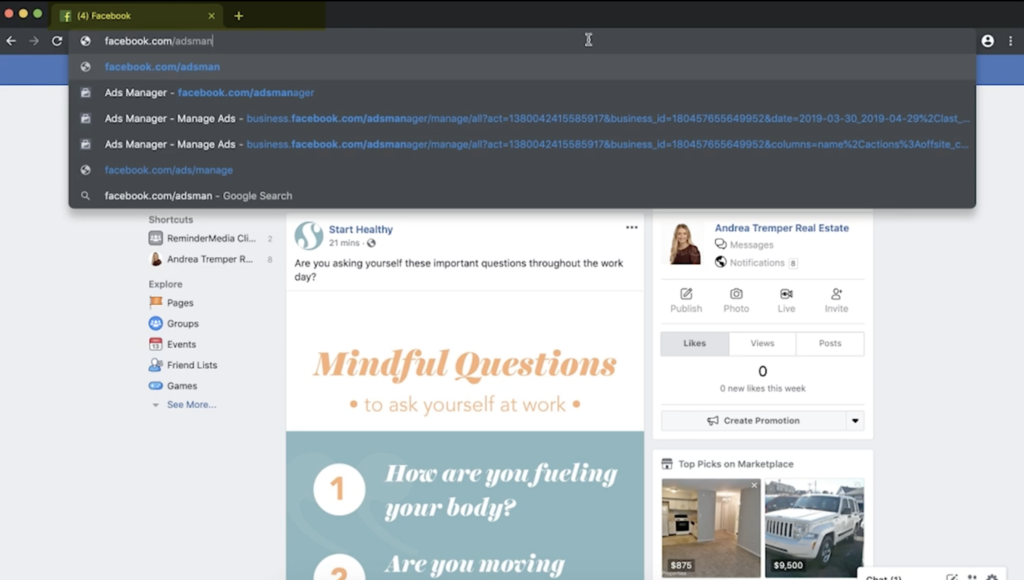
The first thing you’re going to want to do is navigate to your Facebook Ads Manager. To get here, just type facebook.com/adsmanager in your search bar. If you don’t already have an ads account set up, check the link in the description to learn how to create one.
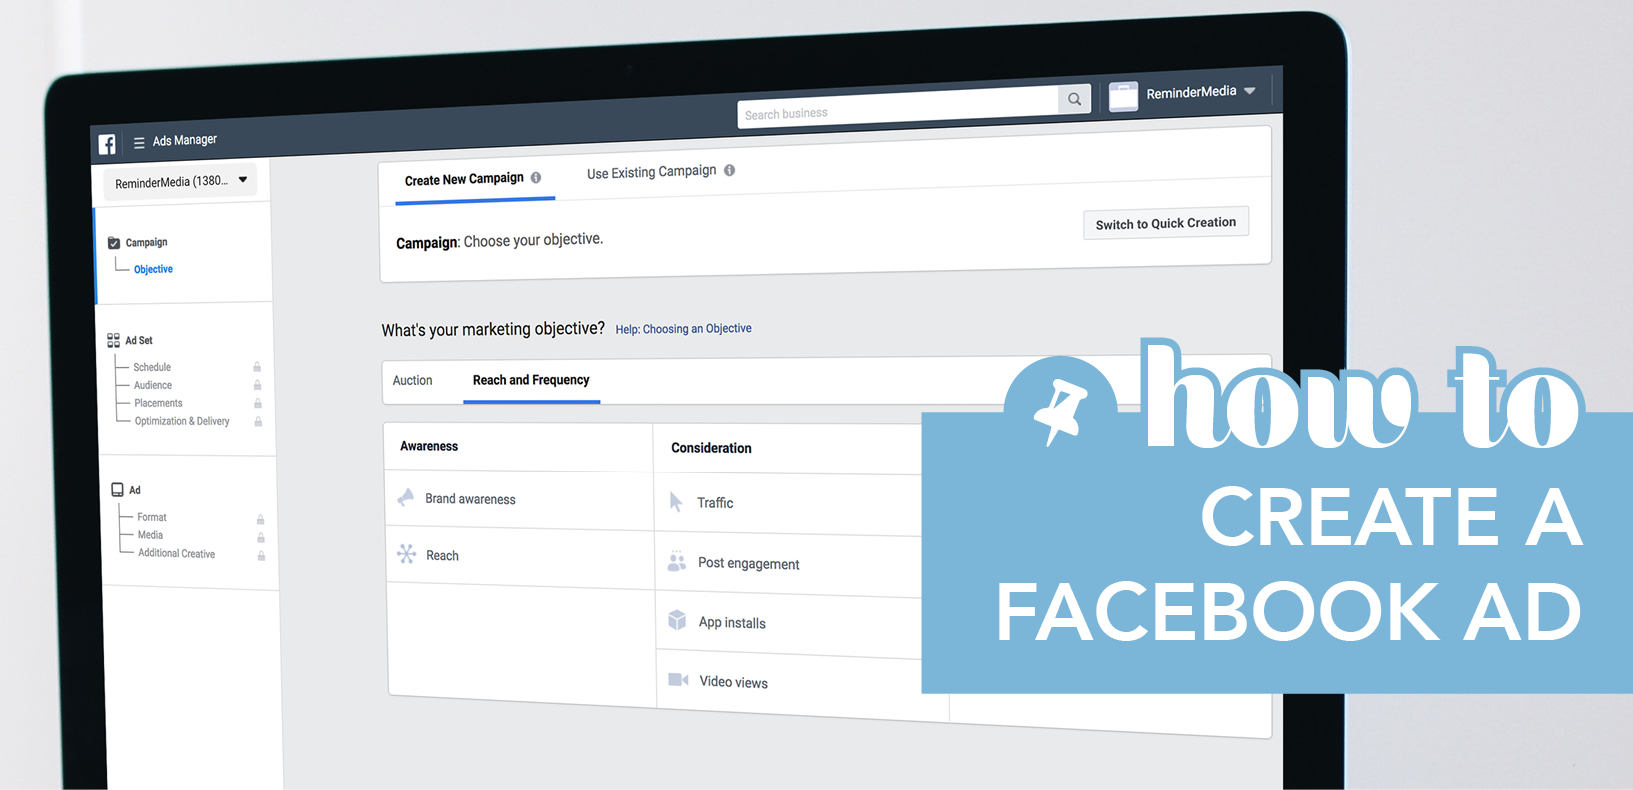
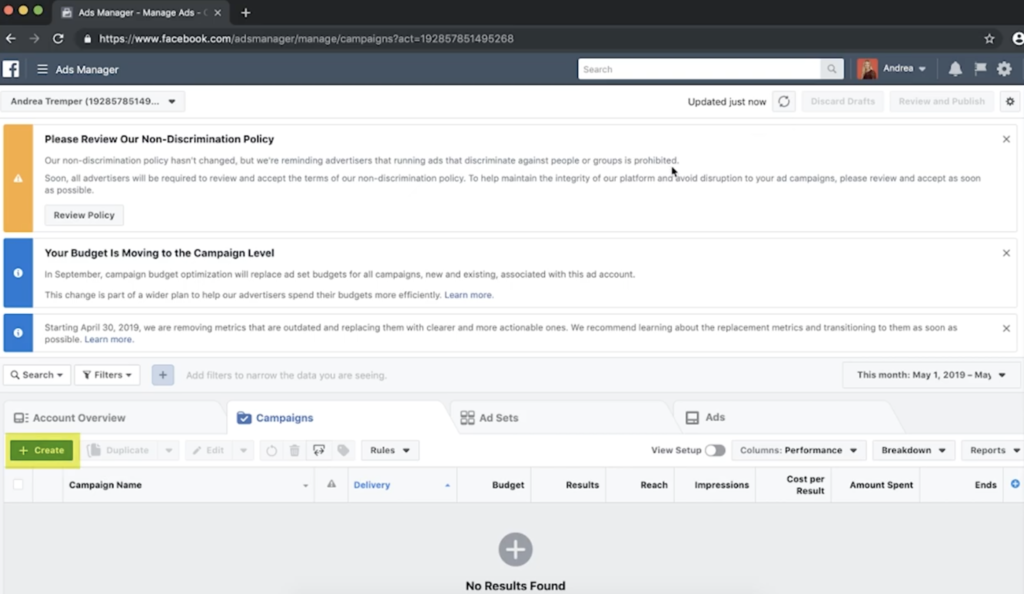
The Ads Manager homepage is where you’re going to monitor all of your active and past campaigns. It will eventually tell you how much you’ve spent and how well your ads performed. Once you’re ready to start creating your ad, you’re going to click the green Create button. This going to lead you to your Campaign Objectives page.
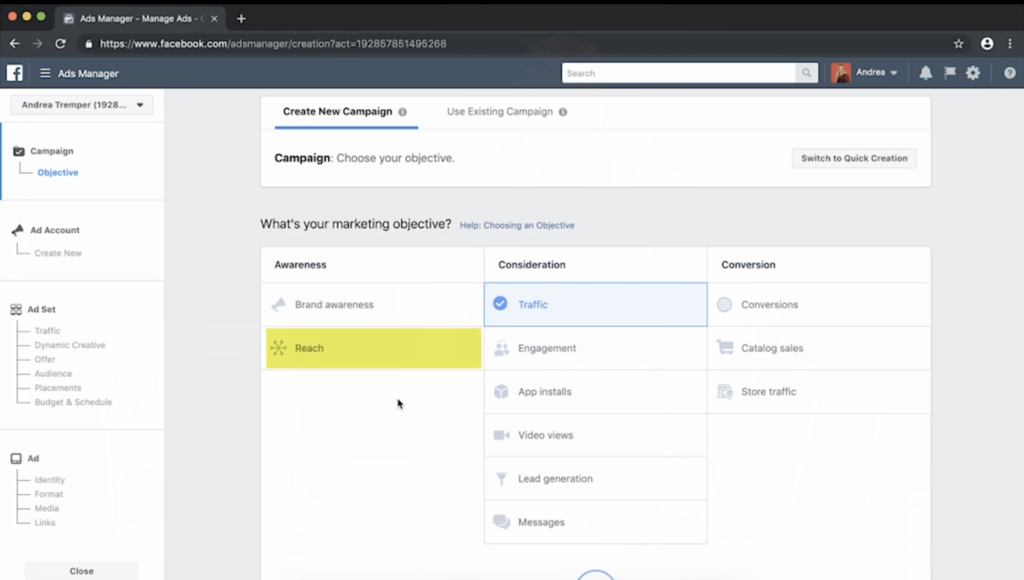
This is where you’re going to choose the objective of your ad. Depending on what you want to do with your ad and who you’re targeting, this is where you’re going to choose that. Since I want to get my ad in front of as many new leads as possible, I’m going to choose the Reach objective.
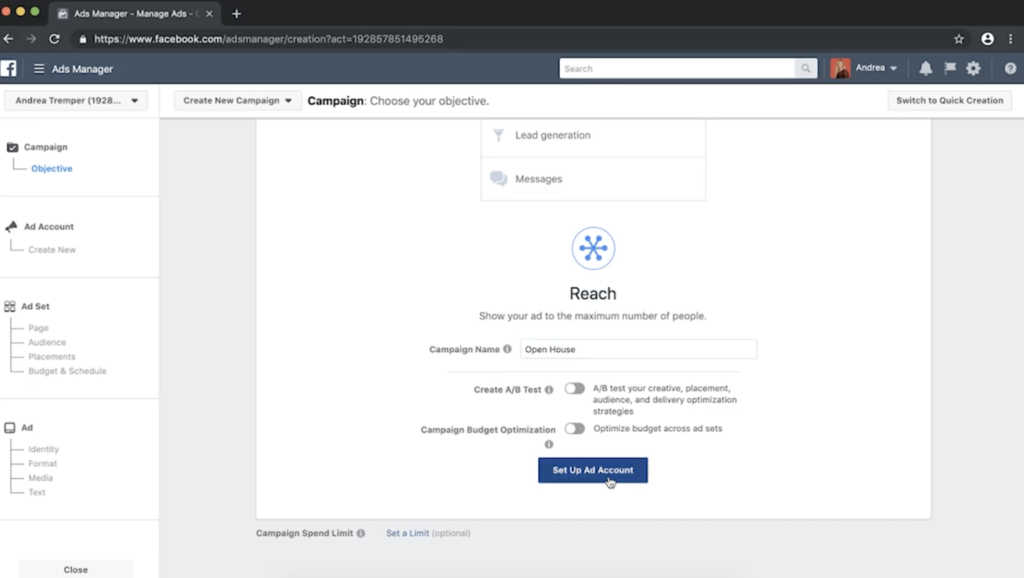
Once you’ve selected your objective, you’re going to scroll down and name your campaign. I’m going to name mine “Open House” so I can make sure it stands out from my other campaigns. Underneath your campaign name, you can actually choose a few other Advanced Options, like creating an A/B split test or campaign budget optimization. For now, we’re just going to stick to the straightforward options, and I’m going to click Set Up Ad Account.
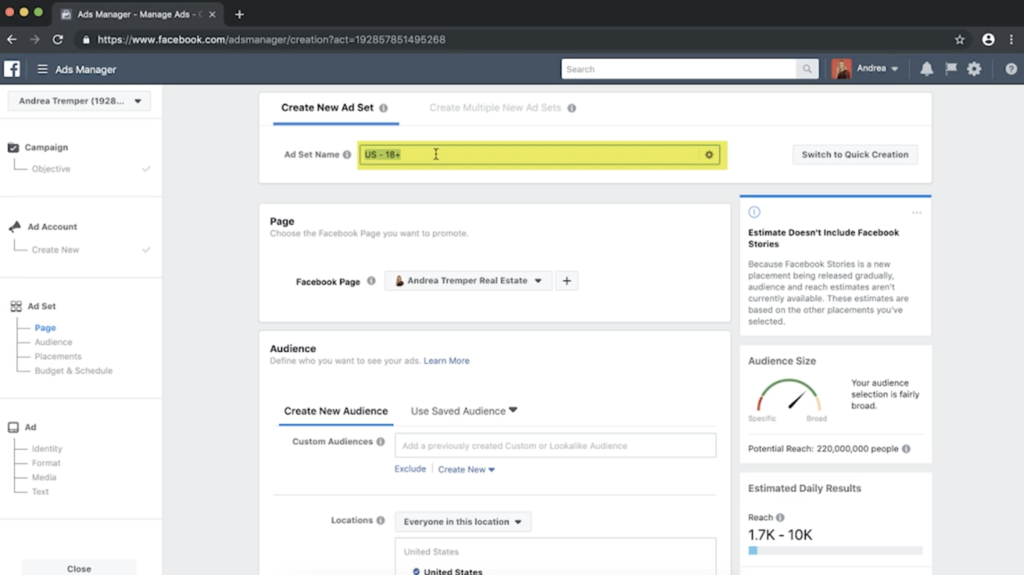
This brings you to the Ad Set page. This is where you’re going to name your ad set. I’m going to name mine “Open House Mulberry Street. Because now, if I have different open house campaigns, I’ll be able to tell that this one is for my open house on Mulberry Street.
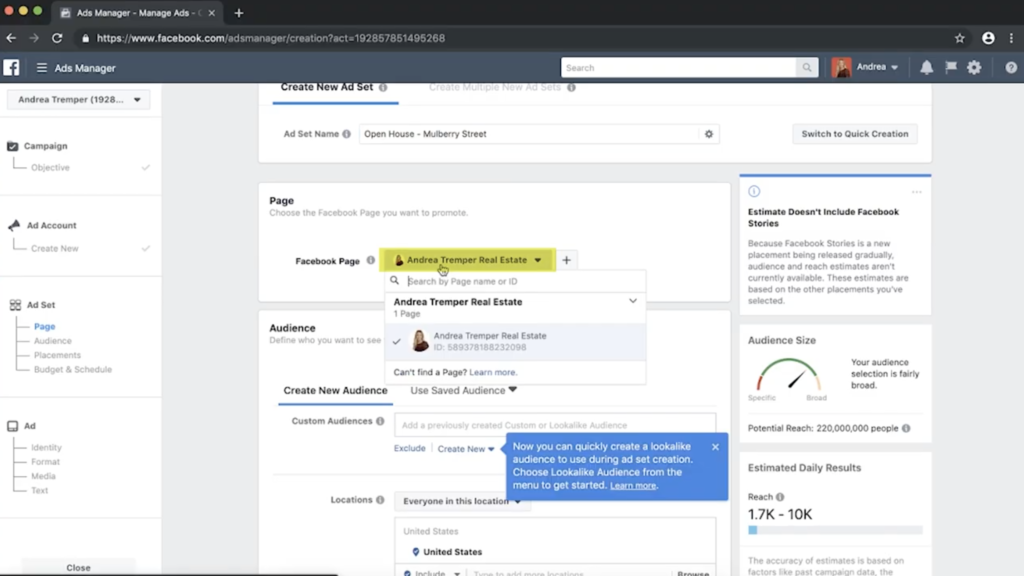
Next, you’re going to need to specify the Facebook page that you want your ads to run on. If you only have one business page set up, then it will automatically select it for you. If you have more than one, you can select the drop-down menu and click your page that you want to run from.
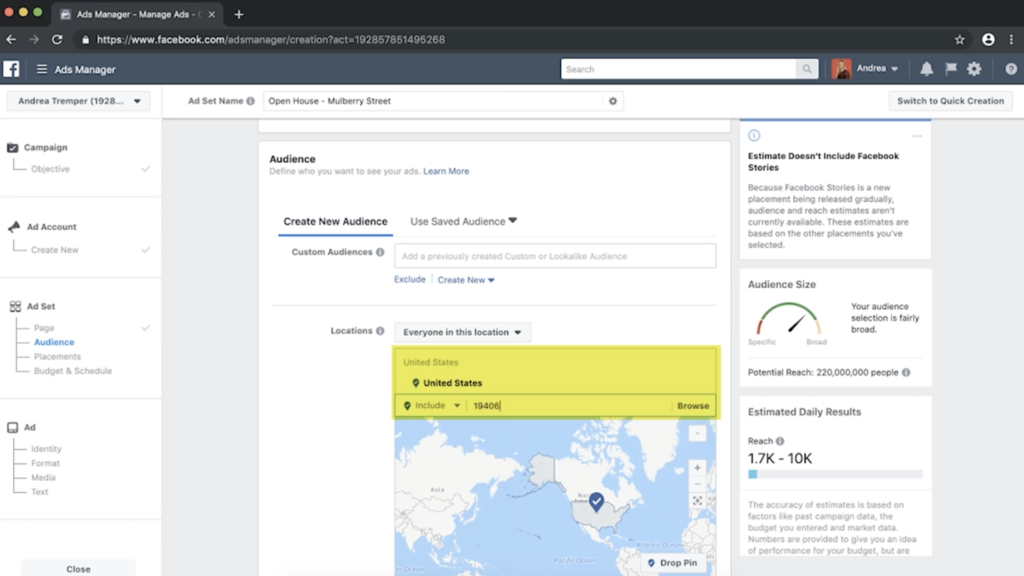
The next part is choosing your audience. You can select multiple locations or choose from a custom audience. With real estate, the more local, the better. I’m going to put in 19406, which is the location of ReminderMedia.
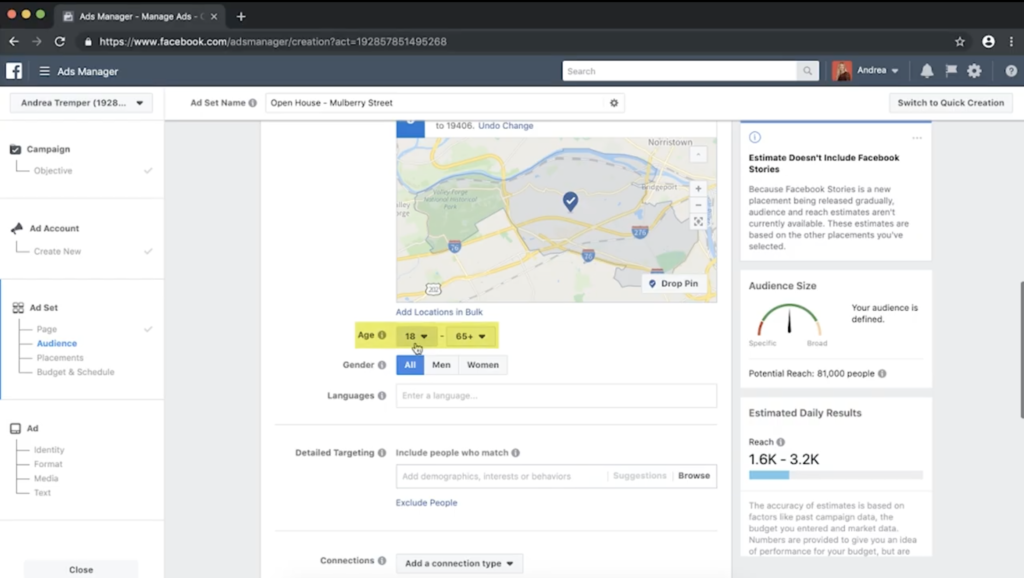
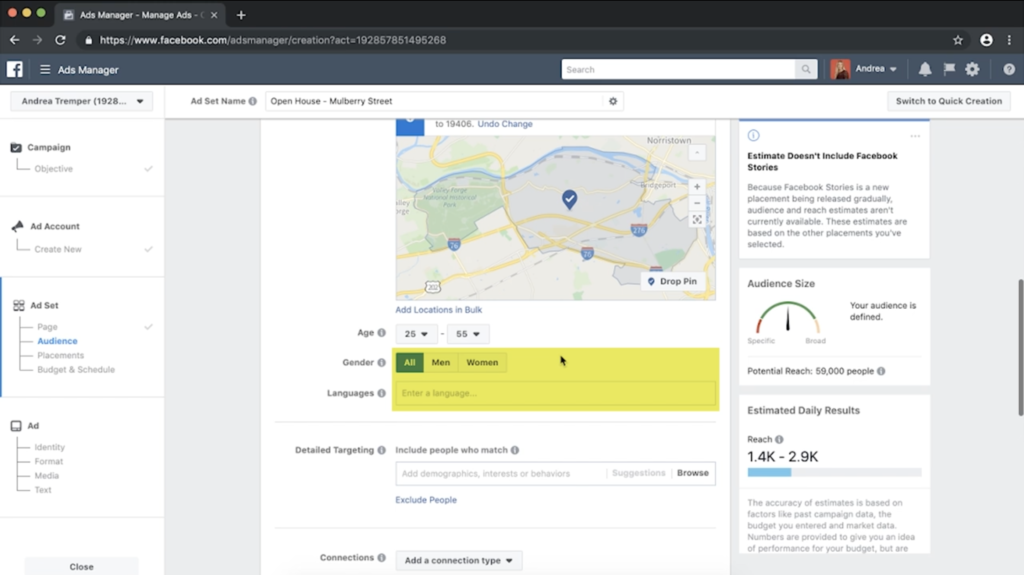
The next section is age. Depending on who you’re targeting, you can select any age range, older or younger. Since we are trying to keep it more general, I’m going to keep it safe and select 25–55. You can also target your ad by men or women. By default, Facebook is going to leave this option as all genders, so I’m going to do the same. And then, you can also select different languages. If your main client base speaks something other than English, you can specify that here.
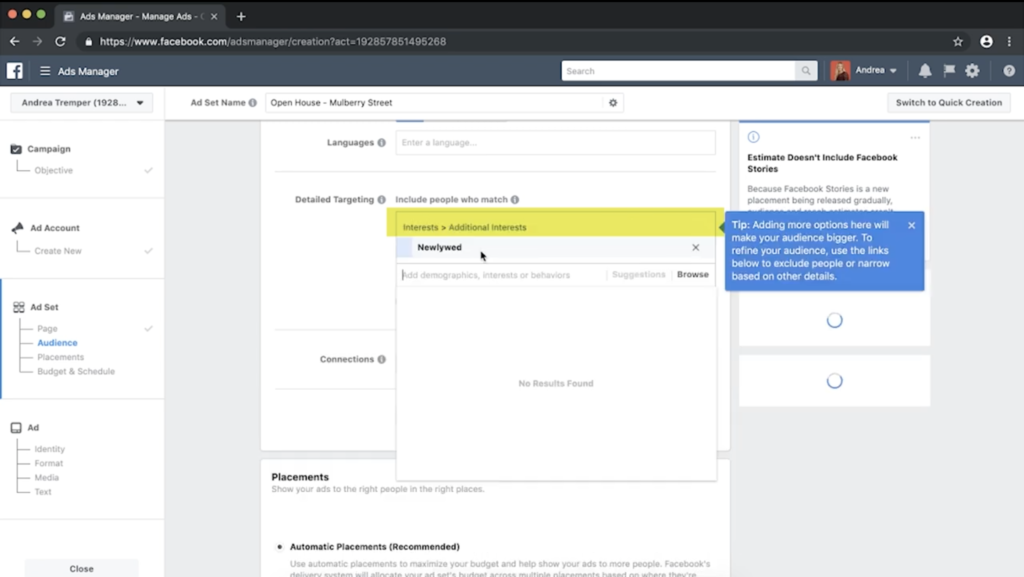
Next, you’re going to narrow your Ad Set by target demographic— segmenting by different traits or interests or behaviors. Since I’m looking for people who are moving, I’m going to start typing in different things, and Facebook will actually start to recommend based on what I write.
I’m going to start with people who are newlyweds or interested in moving. Another great option for real estate agents is to target by people who are interested in Zillow. Most of the people who are interested in Zillow are either looking to buy or have just moved.
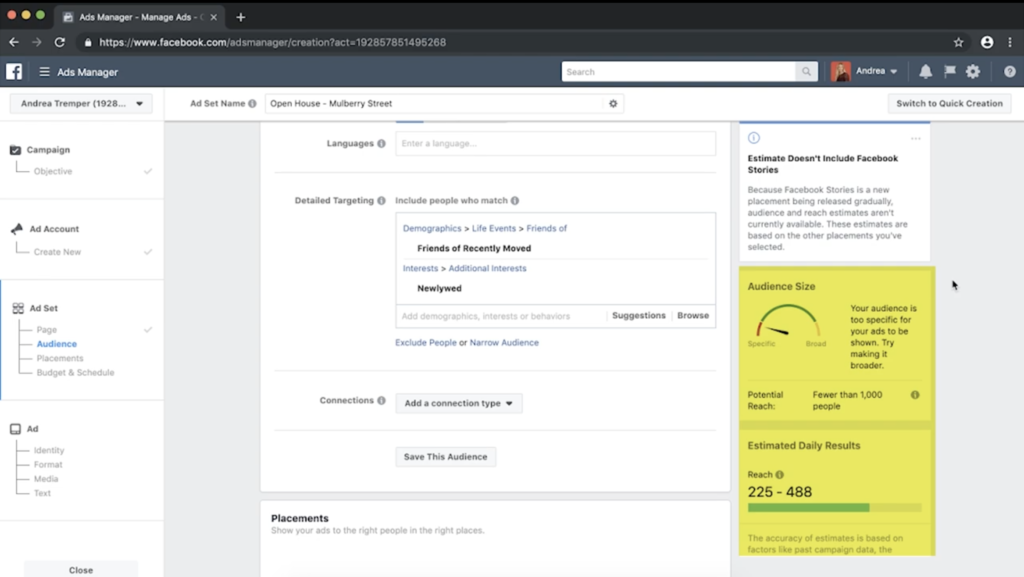
As you start segmenting down your audience, you’re going to notice some numbers on the right-hand side changing. This is going to be your maximum audience reach, as well as your estimated daily results. These are both affected by the budget you have and also the duration of your ad at the bottom of the audience selection. You can click the Connections drop-down menu to get even more specific about the people you want to reach. For example, you can target people who already like your page or their friends. Since I’m trying to get this ad in front of mostly new leads, I’m not going to select anything here.
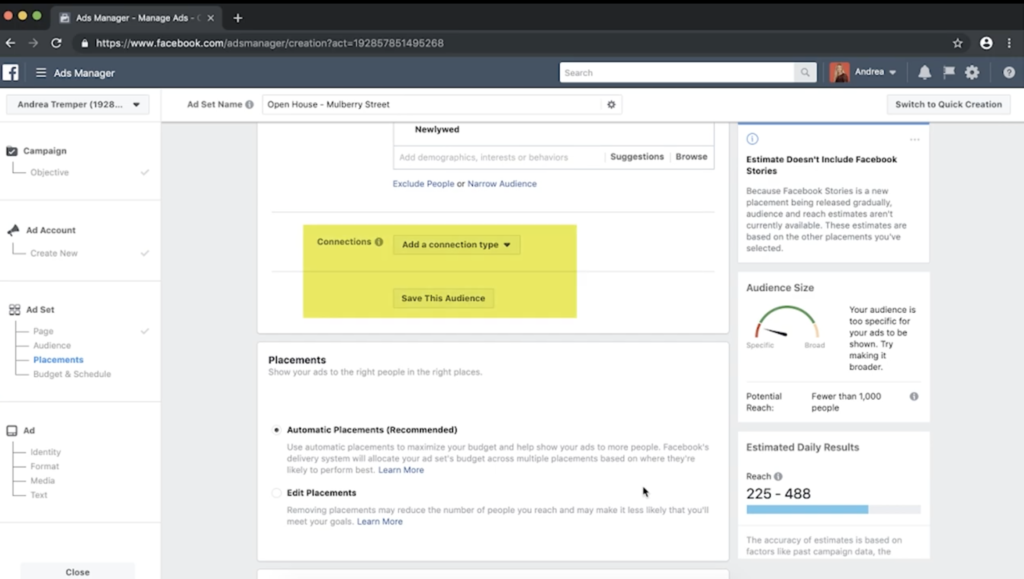
Next up is Placements. By default, Facebook will try to place your ad wherever you’re most likely to connect with people—whether that’s across Facebook or even on Instagram. If you want to edit the locations where your ad can show up, click Edit Placements, and then check or uncheck the boxes, depending on where you’d like your ad to appear. To keep this simple, I’m going to leave Automatic Placements selected.
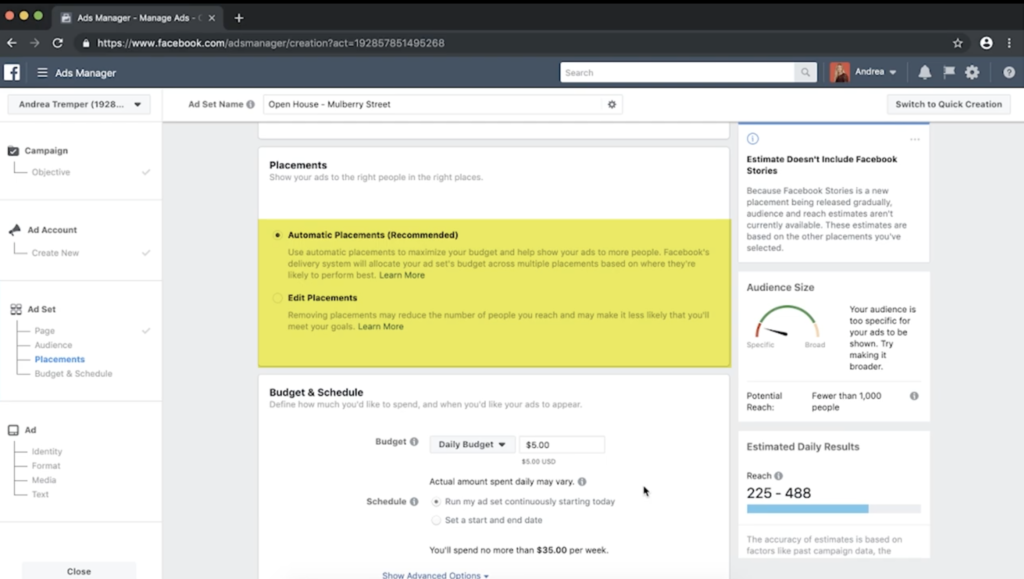
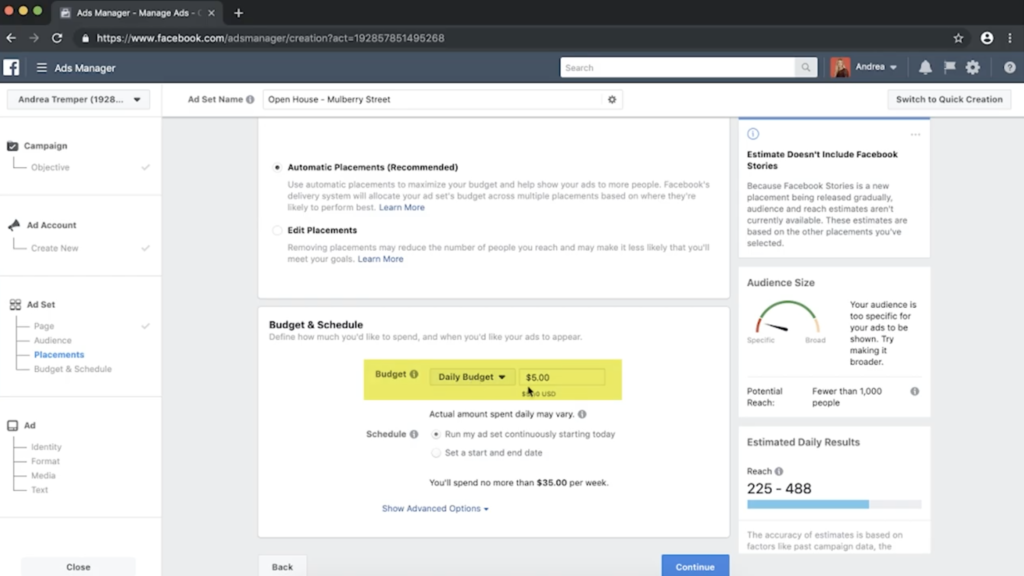
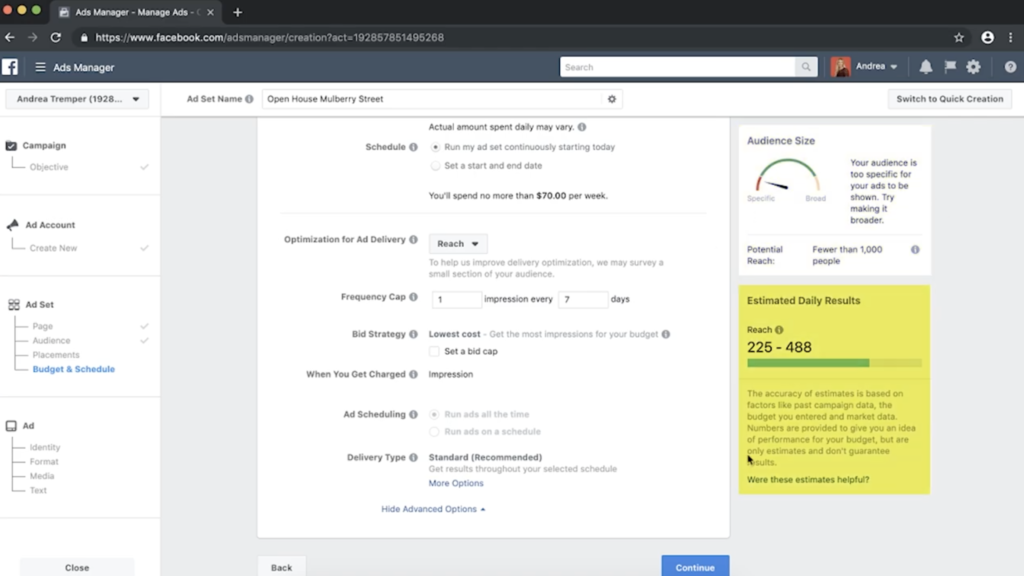
Next up is your Daily Budget and Schedule. You can choose to spend a certain amount of money over your whole campaign or choose a Daily Budget. To start small, I’m going to keep it at Daily Budget, and I’m going to set my budget at $10 a day. This is also where you’re going to start and end your schedule, so I’m going to select a start date of an hour from now, and then end it a week from now at the same time. You want to make sure that you’re selecting at least 15 minutes in advance of when your ad’s going to run. Otherwise, Facebook’s going to give you an error message that says it doesn’t work.
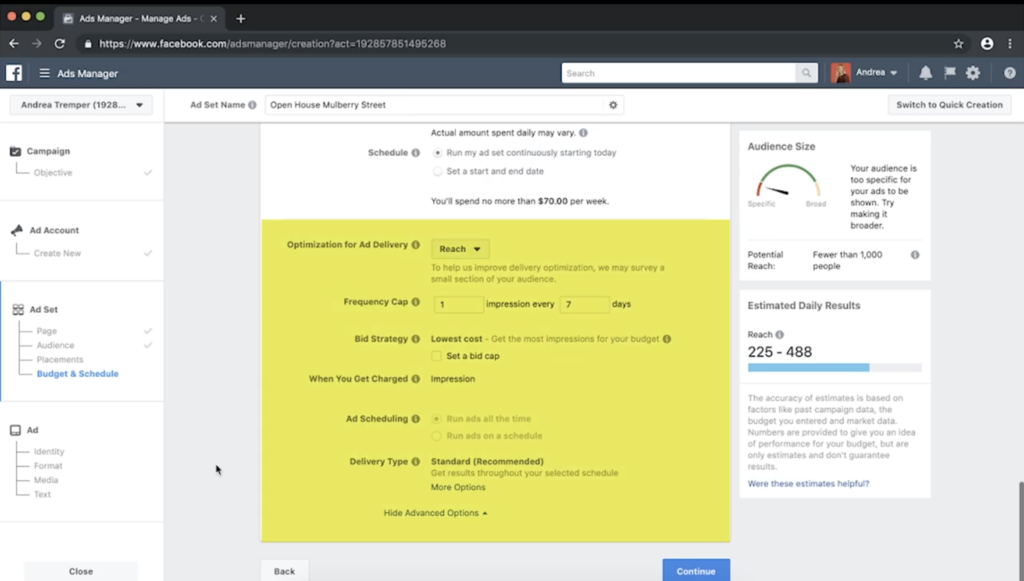
The next section you’re going to see is all about optimizing your ad to make sure it’s running as efficiently as possible. By default, Facebook is going to set the Frequency Cap at somebody seeing your ad once for every 7 days. Since I’m trying to reach as many people as possible, I’m going to leave it set for that.
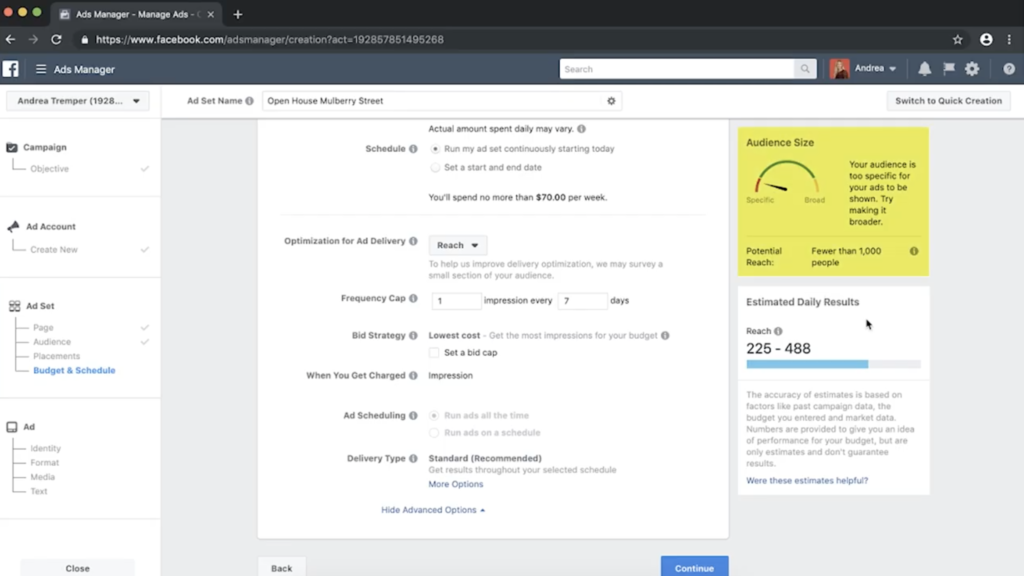
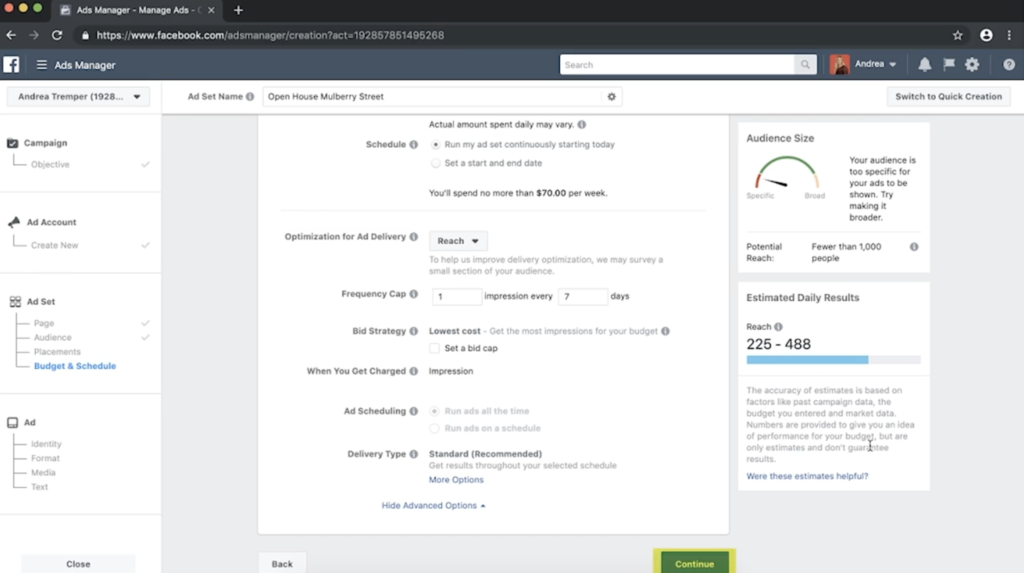
The last thing I’m going to do here is take a look on the right at my Audience Size—which is the maximum audience I’ll reach—as well as the estimated daily results. All of this looks good. So, once I have this set up and finalized, I’m going to click Continue.
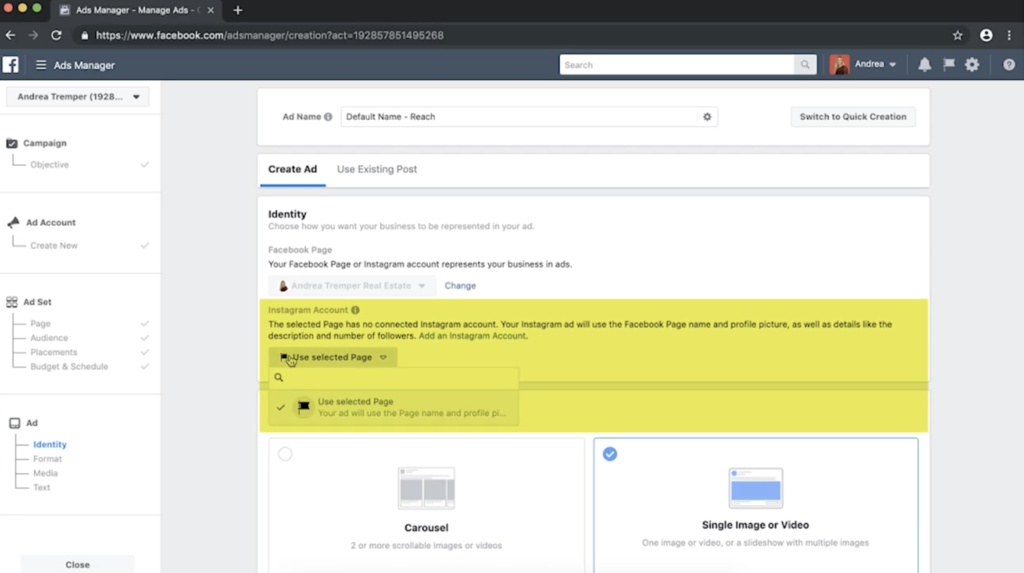
This next section is where you’re going to set up and design your ad. The first section up top is where you’re going to choose to connect your Instagram page. Since Facebook owns Instagram, the two are actually connected when it comes to your ads. If you have your Instagram page connected already, you can select it from the drop-down menu. If you don’t, don’t worry—Facebook will actually still show your ads on Instagram. It just won’t connect them back to your Instagram account.
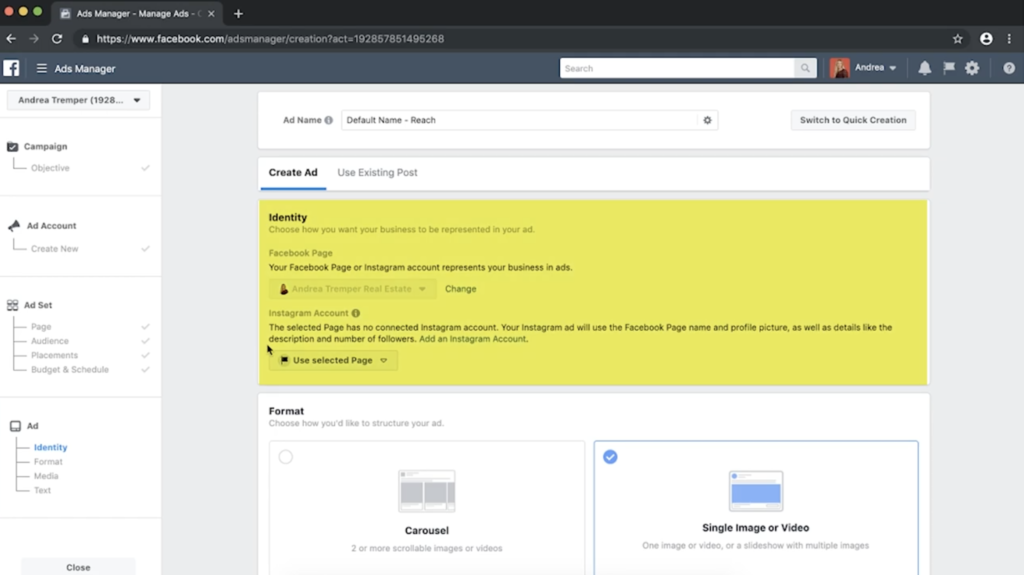
Next, you’re going to choose the format of your ad. You can choose from carousel, single image, or video. To keep it simple, I’m going to keep the single image or video selected. But you can learn more about these different options by looking at the description of this video to have a brief overview of each.
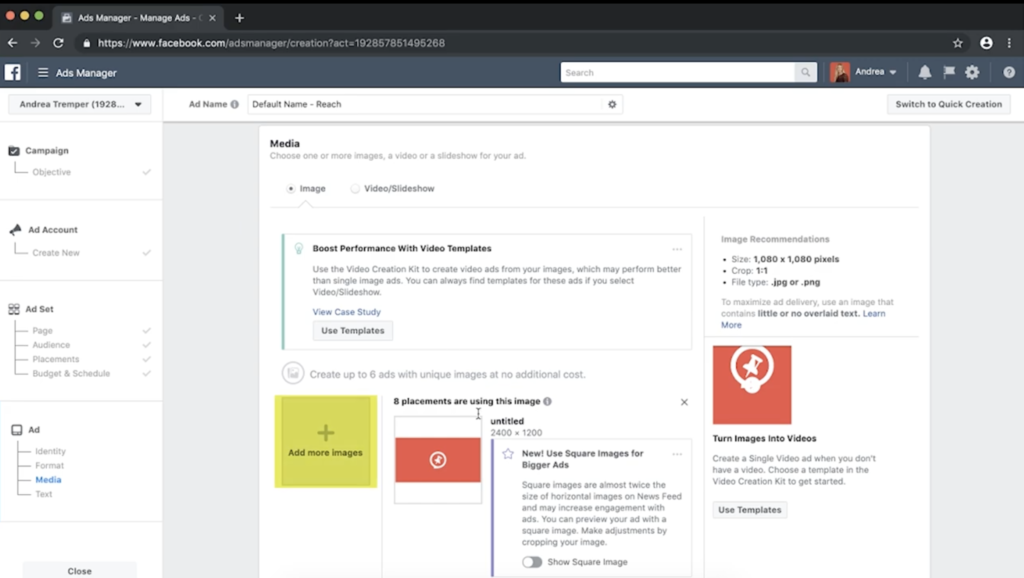
Scroll down until you see the Media section. Leave the Image button selected, and then upload the media that you’d like to use on your ad. There are several different options here for a little bit more advanced slideshow, or maybe carousel images. But, for now, I’m going to keep it simple and use just the one single image. When you’re choosing an image—as silly as it sounds—you want to make sure that what you’re choosing actually reflects your ad, or it can get rejected. You also want to make sure that there isn’t too much text on the image, because Facebook will also reject that.
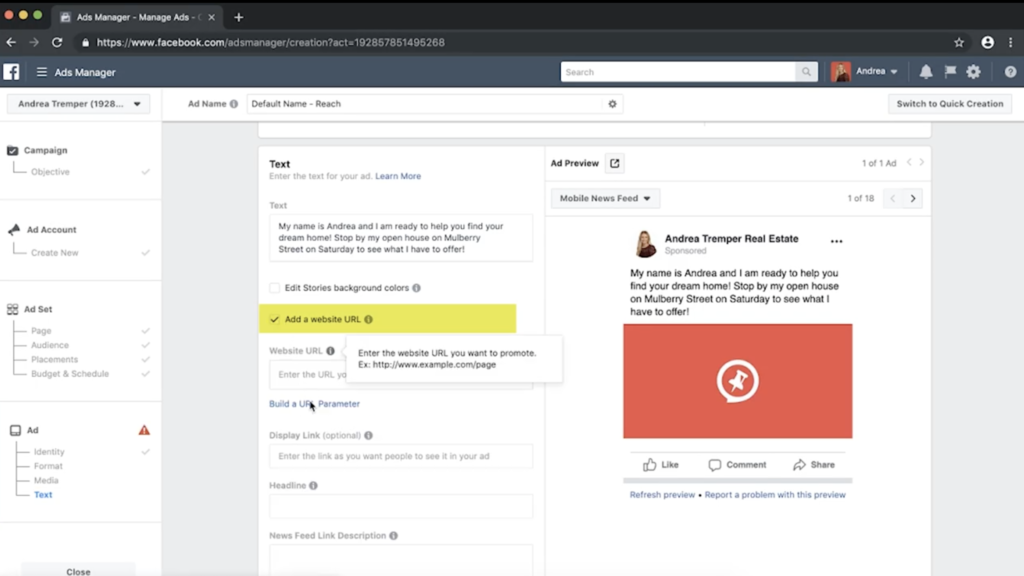
Once you enter the description, scroll down a little bit, and you’ll see that there’s an option to add a website URL. By clicking this box, it will uncover a few more options for you. By entering a website URL to your listing, your open house, or even your own website, the preview on the right will populate with an image from your website. From running ads with a link previewed on the right-hand side, we’ve actually learned that these ads perform worse than if we don’t. So, I’m going to leave that out, and I suggest that you do the same.
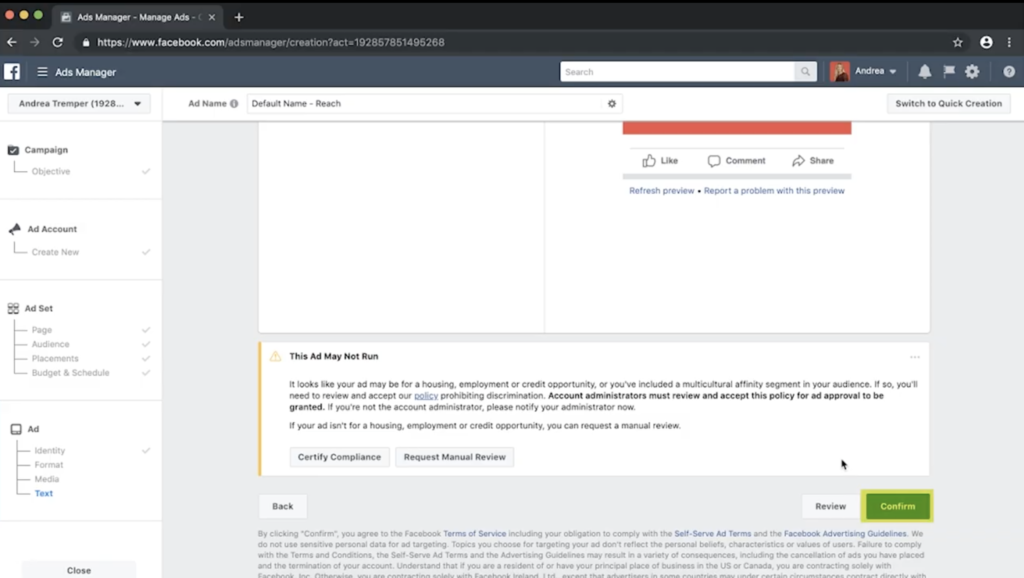
Once you have everything set up on this part, you’re going to hit the green Confirm button. If you don’t already have a payment method set up, you’ll do that right here.
The takeaway
Congratulations! Your ad is now under review. If you haven’t violated any of Facebook’s terms, it should start running soon. Click Continue, and you’ll be taken back to your ads manager account, where you can monitor all of your campaigns.
Be sure to subscribe to this YouTube channel for more great tips. Follow us on Facebook and Instagram: @remindermedia. But, most importantly, put a pin in it!